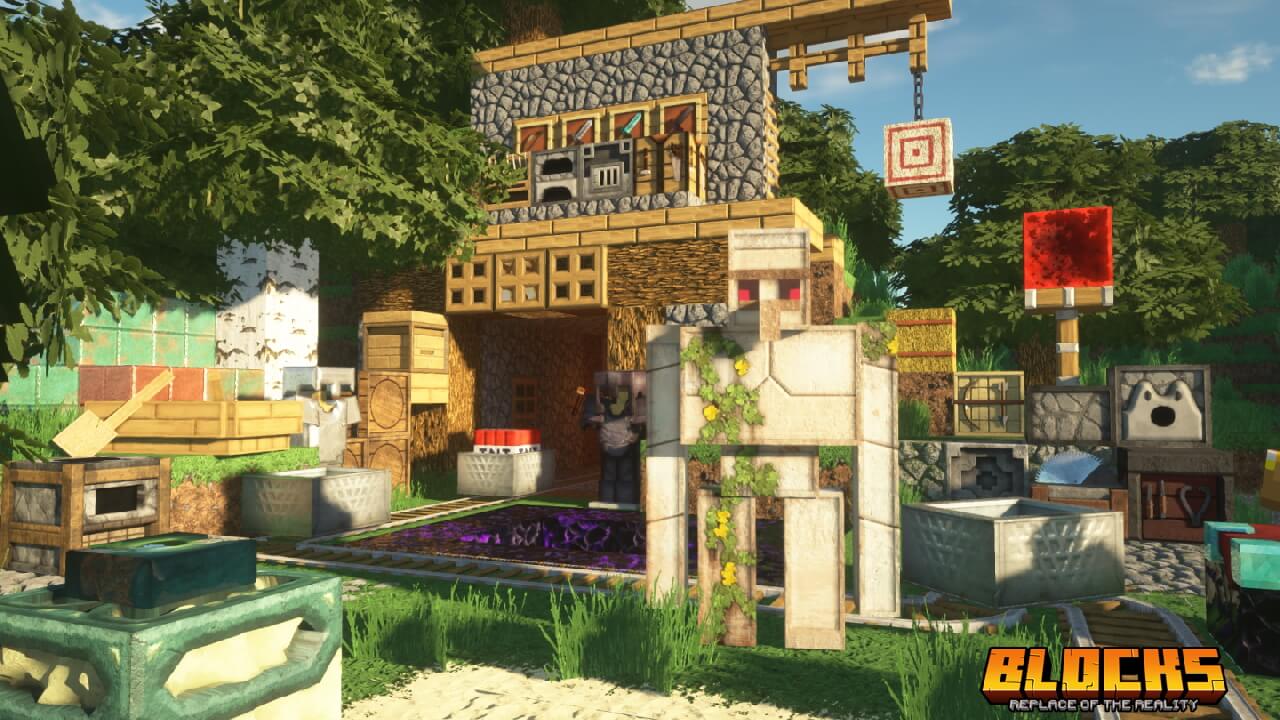
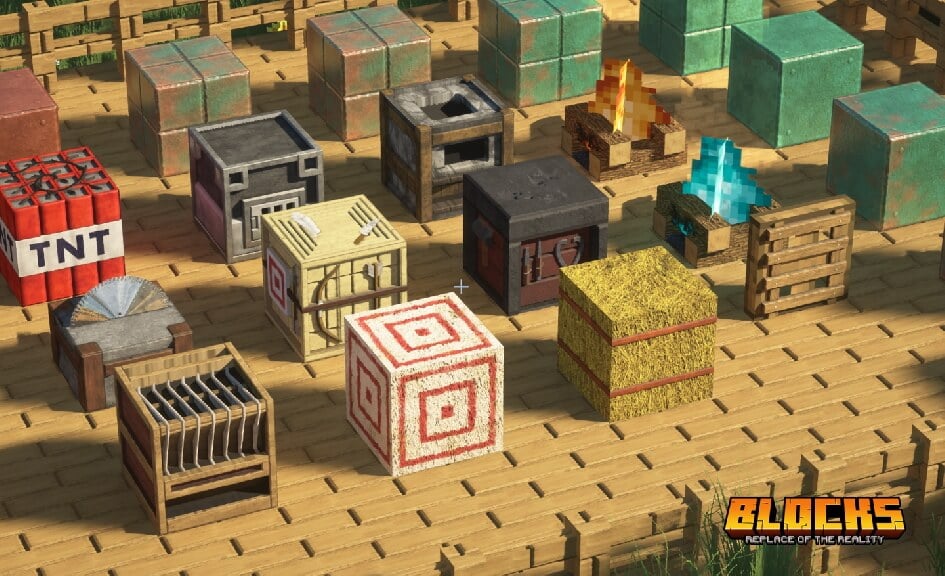
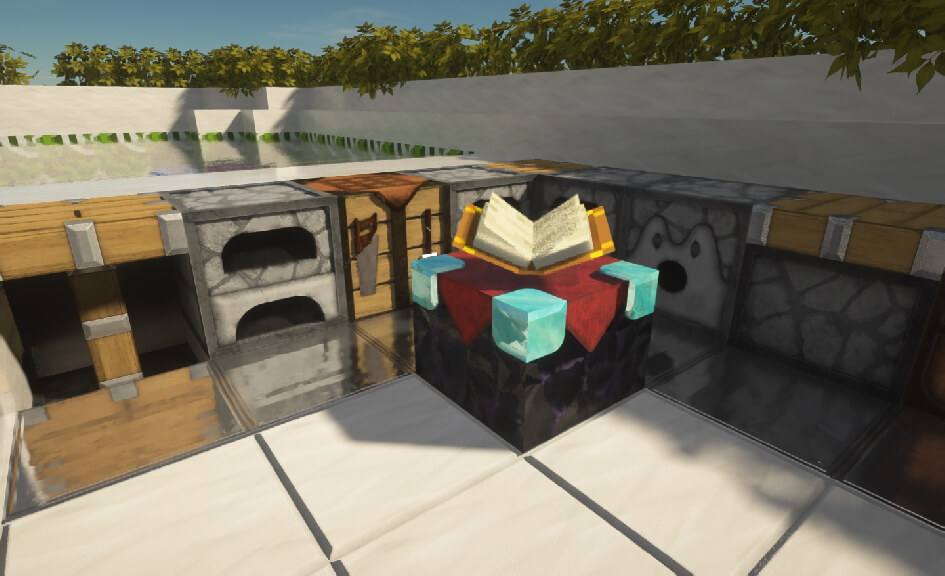
Most Minecraft players love it when resource packs stay true to the normal graphics. The rotrBLOCKS texture pack also has clear similarities with the original look of the game. Accordingly, the style is very similar, but the textures look much better and more realistic. This is due to several reasons. The most noticeable is the higher resolution, which allows you to see much more details on the blocks. There are several different resolutions you can use.
Please note that this pack is optimized down to the last pixel, giving the gameplay a completely different look. If it feels too far removed from the traditional Minecraft style for your taste, check out the Pixlli texture pack instead. It’s from the same creator and adds 3D vanilla textures.
I play with the second-best version because I get decent FPS with it. My computer has not been able to render all HD textures correctly on the most powerful version, which is why Minecraft has crashed. Honestly, this has never happened before, which indicates that the rotrBLOCKS texture pack is realistic. I thought it was because of my hardware, but the problem was not my computer. The enormous file size of the 2048x pack was the big problem because no graphics card was powerful enough to render all high-resolution textures. So the development for 2048x and 1024x was stopped because nobody was able to load the textures. However, you shouldn’t be afraid of getting lags or bugs now either, because usually everything works without any problems.
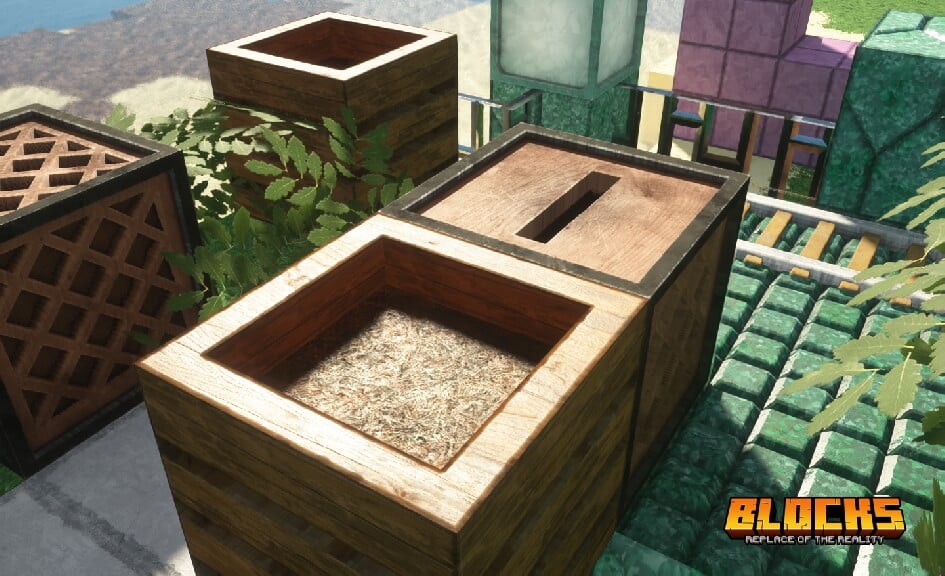
You are probably wondering what is so CPU intensive in the rotrBLOCKS texture pack. Mainly, it’s the outstanding POM and PBR textures that look amazing with a shader. In plain language, this means that the blocks have more depth and the surface has much more detail and indentation. The best way to see this is to get close to a dirt block. There is also another feature and that is connected textures. Maybe you have seen this before in other packs. It is used to beautify the transitions between blocks. This makes the whole environment more harmonious and aesthetic.
Furthermore, it is positive to note that parts of the Replace of the Reality texture pack are free of charge. Therefore, you can download and install the project for free. If you have a really good PC, you can also consider a Patreon membership, because there you will get the extreme resolutions that will push your graphics card to its limit. You should try the 256x edition to see if your computer is capable of rendering such realistic textures.
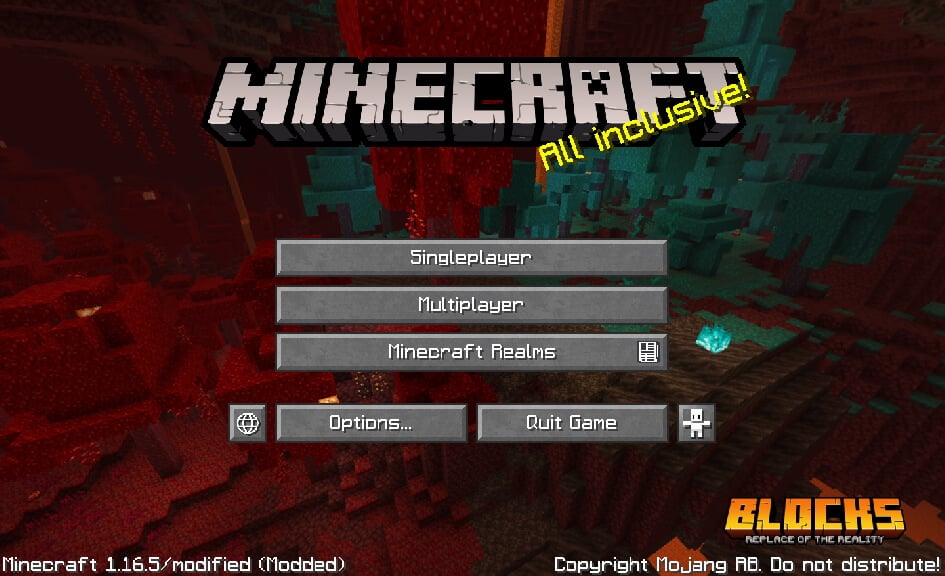
By the way, the creator says about his work that he has created 80% of the pack content completely by himself and only uses occasional images from the internet. He also plans to release a mod that changes the entire GUI.
rotrBLOCKS was released on February 28, 2021 and is compatible with these Minecraft versions: 26.2 - 26.1.2 - 26.1.1 - 26.1 - 1.21.11 - 1.21.10 - 1.21.9 - 1.21.8 - 1.21.7 - 1.21.6 - 1.21.5 - 1.21.4 - 1.21.3 - 1.21.2 - 1.21.1 - 1.21 - 1.20.6 - 1.20.5 - 1.20.4 - 1.20.3 - 1.20.2 - 1.20.1 - 1.20 - 1.19.4 - 1.19.3 - 1.19.2 - 1.19.1 - 1.19 - 1.18.2 - 1.18.1 - 1.18 - 1.17.1 - 1.17 - 1.16.5 - 1.16.4 - 1.16.3 - 1.16 - 1.15.2 - 1.15 - 1.14.4 - 1.14 - 1.13.2 - 1.13
Video & Screenshots
Comparison
Use our comparison tool to compare the Minecraft default pack with rotrBLOCKS.


How To Install rotrBLOCKS Texture Pack
Here’s a tutorial on installing rotrBLOCKS in Minecraft Java Edition. If you’re using Minecraft Bedrock Edition and the pack is available for Bedrock/MCPE, you can simply click on the downloaded file to install it.
- Download and install BSL shaders. Make sure you have set the correct texture resolution in the shader settings.
- Download the rotrBLOCKS texture pack for Minecraft from the file section below. Pick the file that matches your Minecraft edition and version.
- Launch Minecraft.
- Click "Options" on the main menu.
- In the options, go to the submenu “Resource Packs”.
- Click "Open Pack Folder" at the bottom left to see a folder titled "resourcepacks".
- Put the downloaded ZIP file into your "resourcepacks" folder. Or, just drag and drop it into the Minecraft window to add the pack.
- You will see the pack on the left side of the resource pack selection menu. Unzip the file if you can't see the pack.
- Hover over the pack thumbnail and click the arrow pointing right.
If the game notifies you that the pack is made for a newer or older Minecraft version, simply click “Yes” to proceed. Most textures will still work.
- Click "Done" and all assets have been loaded.
To make the rotrBLOCKS texture pack look like the screenshots you have to do a few things. The pack won’t look as nice on you if you don’t follow the complete tutorial above. Shader Packs like BSL are recommended by the developer because it is well-optimized and supports POM/PBR. After the installation, you have to go to the surface settings in the shader options and activate parallax occlusion mapping.
A brief overview so that you don’t get confused by the different packs:
- Base is the main pack that adds new textures and works without OptiFine.
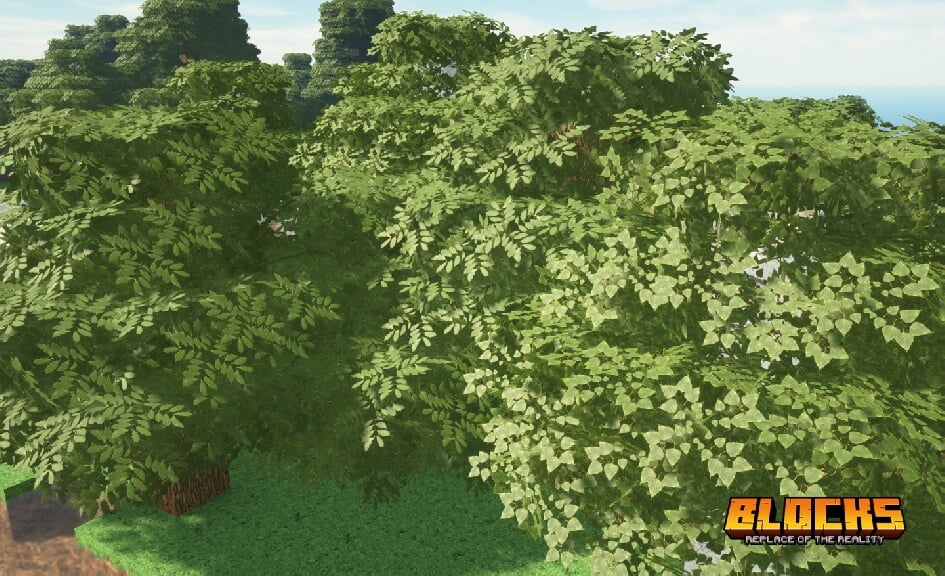
- HQ is an add-on that modifies vegetation and modes so that there are more three-dimensional textures.
- CTM is an add-on for the connected textures feature of OptiFine.
- Item
- Font
- Design
- Dungeons
- Flora
Recommended Shader Settings for rotrBLOCKS
- Shader Options > Materials > Normal Mapping: ON
- Shader Options > Materials > Parallax Occlusion Mapping: ON
- Shader Options > Materials > Specular Mapping: ON
- Shader Options > Materials > Resource Pack Settings > POM Self-Shadowing: ON
- Shader Options > Materials > Resource Pack Settings > Parallax Samples: 80
- Shader Options > Materials > Reflections > Sky Reflections: OFF
Complementary Reimagined Shaders:
- Shader Options > RP Support: labPBR (RP Required)
- Shader Options > Camera > Color Balance > Tonemap Exposure: 2.00
- Shader Options > Camera > Color Balance > Tonemap Upper Curve: 1.30
- Shader Options > Camera > Color Balance > Tonemap White Curve: 2.00
- Shader Options > Camera > Color Balance > Tonemap Lower Curve: 2.00
- Shader Options > Material > Advanced Materials: ON
- Shader Options > Material > Material Format: labPBR 1.3
- Shader Options > Camera > Bloom Contrast: 1.0
- Shader Options > Atmosphere > Fog > Density: 0.1
- Shader Options > Terrain > Vertex Attribute Fix: ON
- Shader Options > Terrain > Parallax Occlusion Mapping > Enabled: ON
- Shader Options > Terrain > Parallax Occlusion Mapping > Samples: 64
- Shader Options > Terrain > Reflections > Resourcepack Reflections: ON
- Shader Options > Lighting > Indirect Light > Emission Mode: labPBR Only
- Shader Options > Lighting > Indirect Light > labPBR Emission Curve: 2.0
- Shader Options > RP Support: labPBR (RP Required)
- Shader Options > Materials > Normalmap Related Settings > Parallax Depth: 1.00
- Shader Options > Texture Resolution: 128-1024
- Shader Options > Surface Options > Texture Resolution: 128-1024
- Shader Options > Surface Options > Parallax Occlusion Mapping: ON
- Shader Options > Material Settings > Parallax: ON
- Shader Options > Material Settings > Parallax Depth: 2.5
- Shader Options > Normal map > RP Support: Parallax
- Shader Options > Normal map > RP Resolution: 128-1024
- Shader Options > Shading > POM > POM: ON
- Shader Options > Shading > POM > POM_DEPTH: 0.30
- Shader Options > Camera > Tonemapping > TONEMAP: reinhard
- Shader Options > Surface > Parallax Occlusion Mapping: ON
- Shader Options > Surface > Physically Based Rendering: ON
- Shader Options > Surface > Depth: 3.0
- Shader Options > Surface > PBR Format: Chroma Hills
- Shader Options > Material > Advanced Materials: ON
- Shader Options > Material > Material Format: labPBR 1.3
rotrBLOCKS Texture Pack Download
The 128x resolution is free. Unzip the file and place the individual files into the resource pack folder one by one.
[128x] [2D Foliage] Download rotrBLOCKS Texture Pack
Paid Downloads (Java Edition):
The resolutions 512x, 256x and some add-ons are paid.

how do i get better frames the highest i get is 50ish. i have a 5070
hi i wanted to know whats the best settings for the rethinking voxels shader
The creator illystray hasn’t published any recommended settings for rotrBLOCKS with Rethinking Voxels yet. Since Rethinking Voxels is based on Complementary Reimagined, you could just use that shader instead, because it’s very similar.
is this for java only?
The pack is currently available for Java Edition only, but a Bedrock version may be released in the future.
strong
amazing, it’s so wonderful
So I installed the base pack (without optifine because im using sodium) alone with bsl (through iris) and I’m having an issue with base blocks (i.e. Cobble stone, stone, diorite and so on) where most of them have the texture but a few blocks here an there aren’t textured, if you put any other block there the textures work (replacing cobble with dirt, the dirt will have the texture but the cobble won’t) Anything you can suggest to help or is it an optifine thing, I’m using the 3d version, also trees and dirt seem to be fine yet to find an untextured one.
Hey Chris, the pack’s still in progress, so some stuff doesn’t have textures yet.