The developer DeDelner has already released some cool Minecraft projects. One of his most popular is ProjectLUMA shaders. It is a pack that has the goal of guaranteeing high FPS and creating realistic Minecraft landscapes at the same time. Everyone is able to play with this shader pack with no lags. Otherwise, it wouldn’t be any fun at all. Some fans even refer to the project as an FPS boost shader. The entire code is so well-optimized that you will notice almost no performance issues.
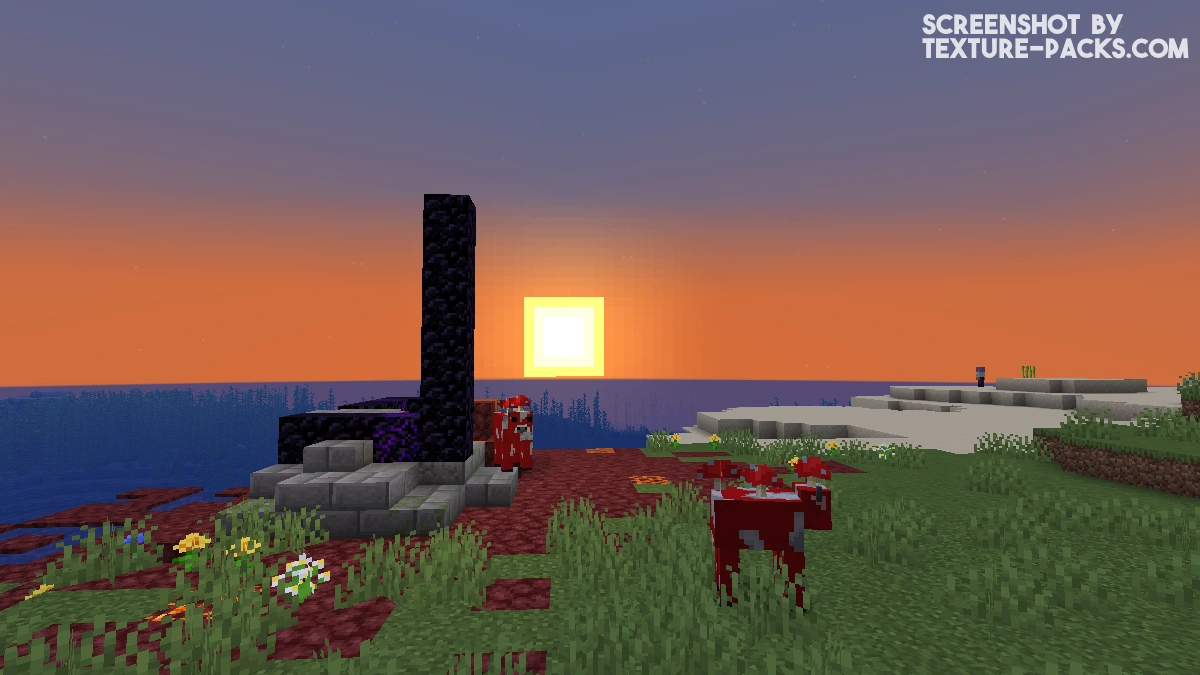
One of the most important features is the sky. According to DeDelner, he spent most of his time on the skyboxes. The clouds are ultra-realistic and fit perfectly into your Minecraft world. In addition, the improved sun rays make everything look not so old-fashioned. After all, that’s one of Minecraft’s core problems. ProjectLUMA shaders definitely manage to provide a realistic gaming experience with these effects. The sky is also reflected in the water. The same goes for your Minecraft skin. These reflections make you think that you are playing a ray-tracing video game. Overall, the sky looks bigger than it actually is and has lifelike graphics.
Furthermore, the KUDA shaders were a great inspiration during the development. This is no wonder because both packs are from the same creator. DeDelner sees ProjectLUMA as a kind of restart, after having already taken a two-year break because he won’t be updating KUDA anymore. This shader is the official successor of KUDA and has been completely reprogrammed with OpenGL. The fact that all this has been done parallel to his studies of computer science has to be emphasized. Accordingly, the whole project is just a hobby, and you should not expect regular updates.
Best Settings for ProjectLUMA Shaders
You can choose between lite, medium, high, ultra, and cinematic in the shader options. These are all ProjectLUMA versions. Modern shaders have such profiles and therefore this is a good quality feature. It is best to start with the low-end version and slowly work your way up. As a result, you’ll quickly notice how powerful your graphics card is on your computer. You should get at least 30 FPS so that Minecraft runs smoothly. The optimal case is a frame rate of over 60.
You can also customize the shadows, effects, surfaces, environment, post-processing, and tone mapping. However, these settings are only something for advanced players who already have experience with Minecraft shaders. If you are a beginner, it’s recommended to select the medium or high profile in the settings. If ProjectLUMA keeps crashing, then you should definitely play with the Lite version.
Another exciting feature is PBR. You can turn the physically based rendering on and off in the surface options. The great thing is extra support for the Chroma Hills and Stratum texture packs. These are the textures that work best with ProjectLUMA. If you have another pack installed or are using the default textures, then you can leave the PBR format at default.
By the way, the minimum requirements are an AMD graphics card. Unfortunately, bugs sometimes occur if your PC has an NVIDIA card instead. Just test the shader yourself, because it’s hard to formulate general system requirements. It also depends on how many other mods you have installed. The shader basically works with all other Minecraft add-ons. These include, for example, Forge, Fabric, and the shaders mod.
You can still report gameplay bugs on GitHub. You should do that whenever a feature doesn’t work properly. It’s also important for you to know that you can download almost all files for free. Only the latest ProjectLUMA update is paid. The developer offers the best version for a few dollars on Patreon. You can find all the links in our download section.
Video & Screenshots

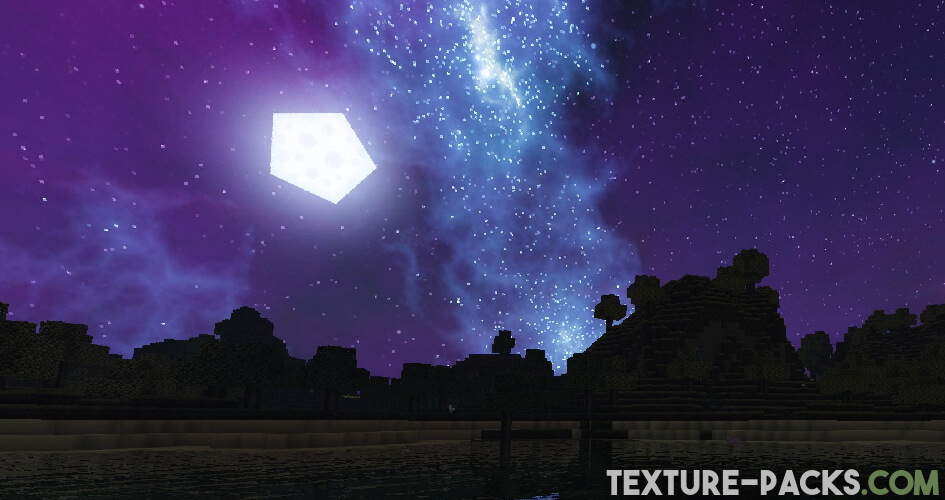
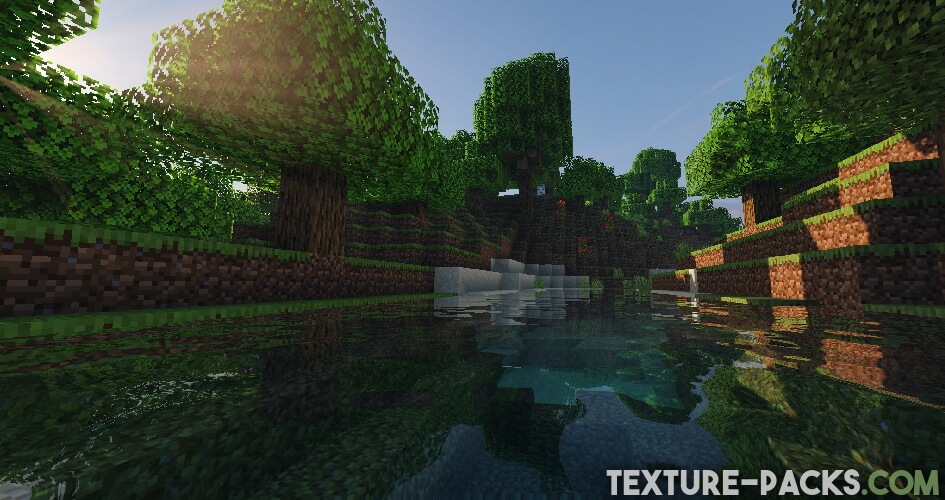
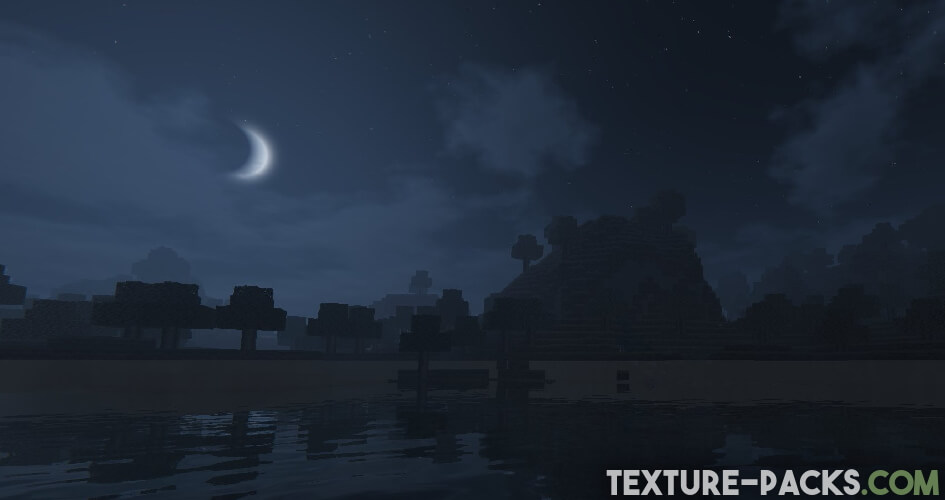
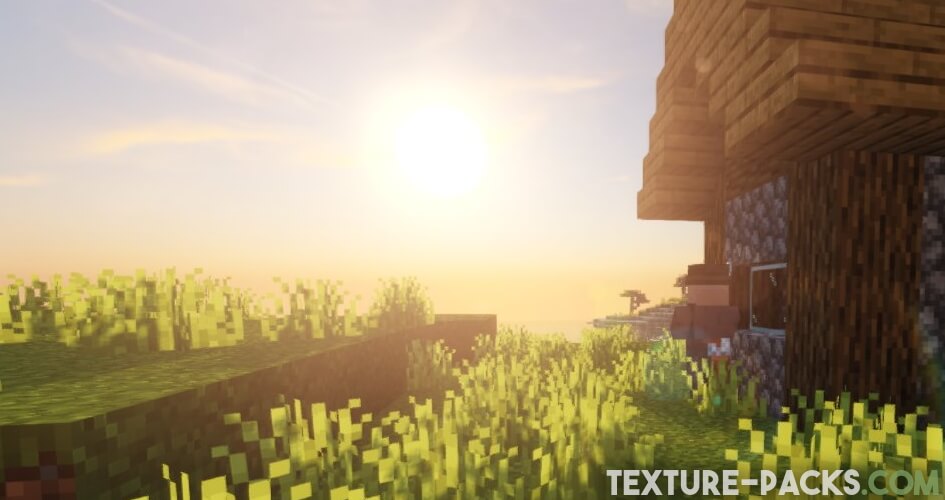
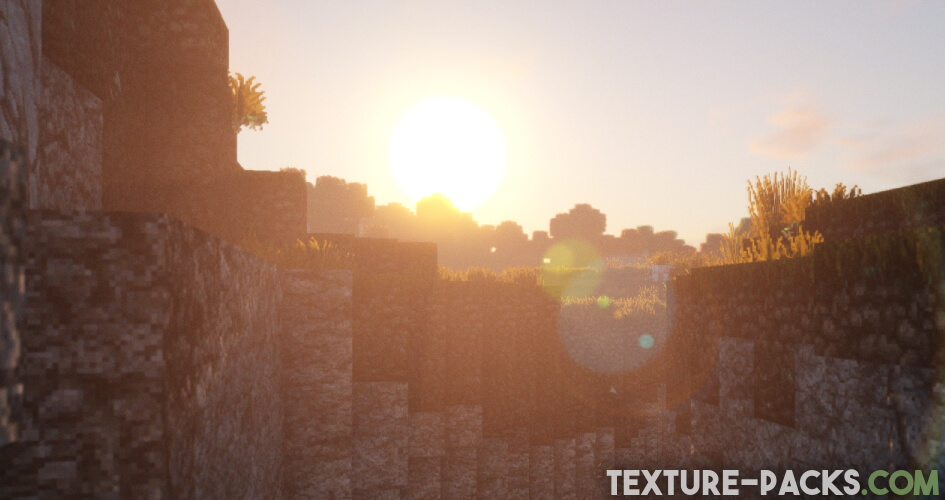
The screenshots show the best features and the ProjectLUMA shader adds god rays for an additional immersive atmosphere. Compared to Minecraft Vanilla, the gameplay is hardly recognizable. The main reason is the completely reworked lighting. The realistic night sky benefits the most from this.
By the way, among the fans are also resource pack makers. A prominent example is the Monsterley texture pack. All official Monsterley screenshots were made with the ProjectLUMA shader. This combination fits because of the great 128x textures.
Comparison
Use our comparison tool to compare the Minecraft default pack with ProjectLUMA.

How To Install ProjectLUMA Shaders
Here’s a tutorial on installing ProjectLUMA in Minecraft Java Edition.
- Download the ProjectLUMA shaders for Minecraft from the file section below. Pick the file that matches your Minecraft edition and version.
- Install OptiFine.
- Open the Minecraft launcher, and choose the OptiFine profile you just made.
- Launch Minecraft.
- Navigate to "Options", then "Video Settings", and click on "Shaders." Afterward, click on "Shaders Folder" to open the shaderpacks folder.
- Move the downloaded ZIP file into this folder (.minecraft\shaderpacks).
- In the game, choose the newly installed pack from the shaders list.
- Click "Done" and all new features have been loaded.

nice shader
I would love to see this shader support Distant Horizons!
I want the shader☺️🫵
I want the shader
I use Iris mode. Do you know why I get the following error in version 1.21?
composite1.fsh: composite1.fsh: 0(46) : error C7537: OpenGL does not allow ‘sample’ after a type specifier
0(46) : error C0000: syntax error, unexpected ‘=’, expecting ‘;’ or ‘(‘ at token “=”
0(54) : error C0000: syntax error, unexpected “+=”, expecting “::” at token “+=”
0(56) : error C0000: syntax error, unexpected “/=”, expecting “::” at token “/=”
0(57) : error C0000: syntax error, unexpected ‘*’, expecting “::” at token “*”
0(40) : error C1110: function “lightScattering” has no return statement
Iris is Fabric based. So bye-bye for whom use Forge or NeoForge. And OptiFine is just shit (performance AND mentality) and is not compatible with even 1.20.2
So what can we do ?
Fabric?
I like for shader