Minecraft Iris shaders mod has been one of the most popular Minecraft add-ons for years, is up-to-date, and runs without lags. It is the link between shader packs and Minecraft. You can decide for yourself whether to install it with the installer or with a modloader, such as Fabric or Quilt. This software solution has already been downloaded over five million times since its first release. By the way, everything is completely free.
The Story of Iris Shaders Mod
The project was started because, according to the developer, there were not enough suitable mods for an easy shader installation. A long time ago, there was the GLSL shaders mod, but it was only developed until 2017 and has not been updated since then. If you still read on websites that it is still playable with newer versions, that is fake news. It was only possible to add shader packs with OptiFine HD after 2017. The problem is that OptiFine doesn’t work out of the box with new game versions, and there are many more difficulties with popular modpacks compared to Iris. Also, the programming code is outdated and brings problems as a result.
All in all, the installation method with OptiFine is cumbersome and outdated. Therefore, it is quite clear who wins the battle Iris vs OptiFine. We recommend you the new Iris shaders mod, which has a more organized codebase and a more user-friendly interface design. Iris is definitely better than OptiFine. If you are a fan of both, you have to choose because they don’t work together and are stand-alone.
Boost Your Minecraft FPS with Iris Shaders Mod
Furthermore, you get higher FPS with the Iris mod than with the already-mentioned alternative. This is probably the best argument for a download. Playing is only fun when the gameplay runs smoothly. You should reach at least 60 FPS with an average PC and not get any frame drops. The constant FPS is mainly possible due to two features. Most important are the optimized Minecraft shadows, which are cleverly programmed and reduce the CPU load. The same applies to the objects in the game. The rendering is optimized so much that you can expect over 50% higher FPS even in Minecraft Vanilla.
In addition to that, the project is open source and the source code is freely available on GitHub. This brings the advantage that many volunteers can contribute, and no single person is solely responsible for new updates. The result is that the Iris shaders mod works immediately with new Minecraft updates. More features are planned for the future, which will further improve Minecraft’s performance.
The conclusion is that the Iris shaders mod is the best thing that could happen to the Minecraft Java community. It has never been so easy to beautify virtual landscapes. The project only offers benefits for PC players. Bedrock players might feel disadvantaged now, but they don’t have to. MCPE gamers can add Minecraft PE shaders on mobile devices, and they can do so without an add-on program. By the way, Android apps like PojavLauncher are not supported because they have many bugs and are illegal to boot. Also, Iris is not available for consoles like PlayStation, Nintendo Switch, and Xbox.
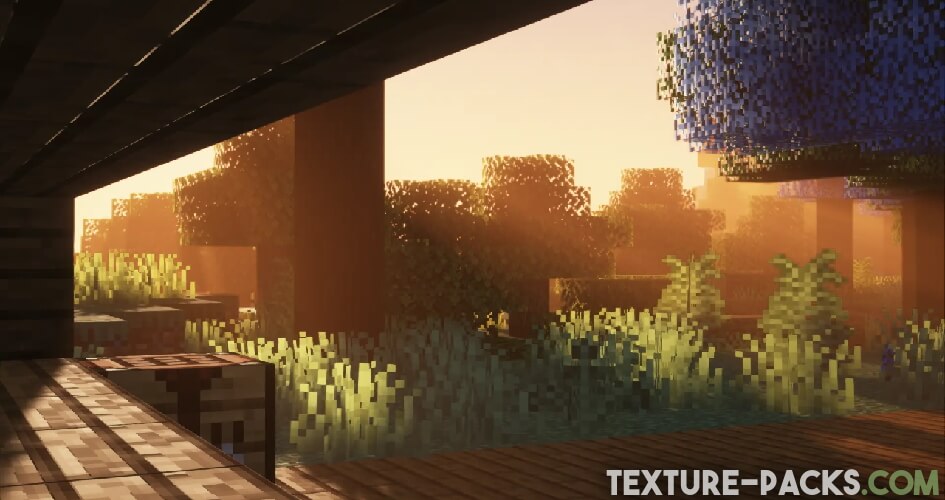
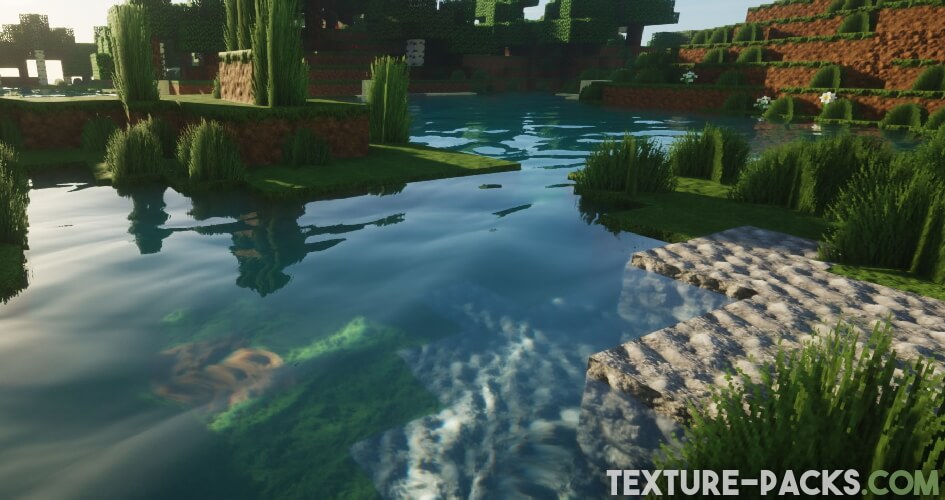
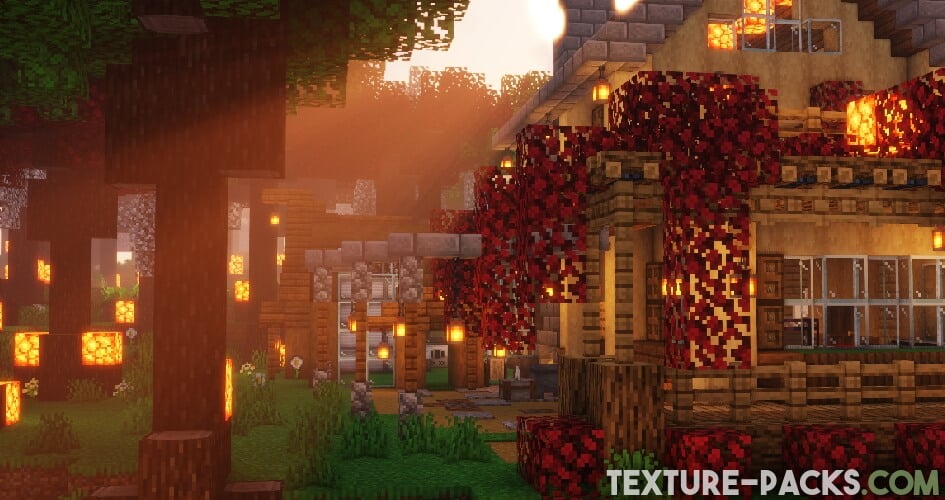
Video & Screenshots
How To Install Iris Shaders Mod
You don’t need any prior technical knowledge or computer skills for the installation. Just follow our simple guide to make everything work. The installation information is only useful if you want to install shaders and don’t play with any other mods. If you want to add more mods, then move the shaders file to the mods folder. Anyway, we’ll start now with a very detailed guide for Minecraft Vanilla players. We are going to teach you how to add shaders to Minecraft without OptiFine.
- Scroll down to the Iris shaders mod download link and click on it. Your browser will start downloading the JAR file. It must be a Java archive.
- Because of the file format, you must also install Java to run the shaders mod. Java is available for Windows, Mac OS X, Linux, and Solaris.
- Move the shaders mod from your download folder to your desktop. You can open the download directory in most web browsers by pressing CTRL+J.
- Right-click on the downloaded shaders mod and click on “Open with”. Select Java (TM) Platform SE binary as an app. This step differs depending on the operating system because sometimes a double click on the file is enough. If you still can’t open the file with Windows, you have to install Jarfix.
- Select Iris & Sodium as the edition in the installation wizard. This will allow you to run Minecraft with Iris and Sodium. You also have to select your Minecraft version in a dropdown menu, and you can also enter a different installation path, but this is unnecessary.
- Click on Install and close the window when the loading bar reaches 100%. You have now added a shader button to Minecraft and activated Iris.
- Run the Minecraft Launcher.
- Click on the small arrow next to the green play button and pick Iris from the dropdown menu.
- Start the game and confirm that you want to play with a modified Minecraft installation.
- Go to the video settings in the Minecraft options and click on the shader packs tab.
- Open the shader pack folder at the bottom left. This is where you can install shaders without OptiFine.
- Download a pack from our Minecraft shaders list and move it to this folder. As an alternative, you can drag and drop a shader ZIP file into the Minecraft window and import it that way.
- Return to Minecraft, activate shaders at the top, and click on the name of a pack.
- Click on done and you have successfully installed the Iris shaders mod with a shader pack.
Customizing Shader Settings
If you are already an expert, then you can adjust everything to your preferences in the shader pack settings. This is sometimes mandatory because many Minecraft texture packs have special requirements. A great feature is that you can import, export, and reset shader settings at the top of the screen. This is extremely user-friendly and especially great for beginners to make their own configurations.
After that, you can add as many unique shaders as you like. All you have to do is follow the instructions from steps ten to fourteen. By the way, you can also use this information as help for the next Minecraft version. We are always happy to help you if you have any further questions. Write a comment at the bottom of this page or read our FAQ.
Iris Shaders Mod Download
This installer downloads Iris with Sodium.
Iris for Fabric and Quilt
[26.2.x] Download Iris Shaders Standalone
[26.1.x] Download Iris Shaders Standalone
[1.21.11] Download Iris Shaders Standalone
[1.21.10 – 1.21.9] Download Iris Shaders Standalone
[1.21.8 – 1.21.6] Download Iris Shaders Standalone
[1.21.5] Download Iris Shaders Standalone
[1.21.4] Download Iris Shaders Standalone
[1.21.3 – 1.21.2] Download Iris Shaders Standalone
[1.21.1 – 1.21] Download Iris Shaders Standalone
[1.20.6] Download Iris Shaders Standalone
[1.20.5] Download Iris Shaders Standalone
[1.20.4] Download Iris Shaders Standalone
[1.20.3] Download Iris Shaders Standalone
[1.20.2] Download Iris Shaders Standalone
[1.20.1] Download Iris Shaders Standalone
[1.20] Download Iris Shaders Standalone
[1.19.4] Download Iris Shaders Standalone
[1.19.3] Download Iris Shaders Standalone
[1.19.2] Download Iris Shaders Standalone
[1.18.2] Download Iris Shaders Standalone
[1.17.1] Download Iris Shaders Standalone
[1.16.5] Download Iris Shaders Standalone
Iris for NeoForge
[26.2.x] Download Iris Shaders NeoForge
[26.1.x] Download Iris Shaders NeoForge
[1.21.11] Download Iris Shaders NeoForge
[1.21.10] Download Iris Shaders NeoForge
[1.21.8 – 1.21.6] Download Iris Shaders NeoForge
[1.21.5] Download Iris Shaders NeoForge
[1.21.4] Download Iris Shaders NeoForge
[1.21.3 – 1.21.2] Download Iris Shaders NeoForge
[1.21.1] Download Iris Shaders NeoForge
[1.21] Download Iris Shaders NeoForge
How To Use Iris Shaders Mod
Now that you’ve successfully integrated Iris into Minecraft, it’s time to learn how to use the mod. The video settings have been completely overhauled. You can find all the default settings in the general and quality tabs.
You should remember these key combinations:
- Press “K” if you want to turn the current shader pack on or off. This can be done quickly because you don’t have to open the GUI. This feature saves time when it gets too dark in a cave and you need a better view.
- Pressing the “R” key will reload the current pack. Usually, this is unnecessary, but useful if you have a black screen or bluescreen.
- You can open the shader menu by pressing the letter “O” on your keyboard. Due to the transparent background, you can see shader changes in real time.
Unfortunately, the popular OptiFine features connected textures, zoom, and dynamic lightning are not available in Iris. You have to use third-party fabric mods here. At least there are no troubles with PBR and POM.
FAQ
Iris is compatible with BSL, AstraLex, Complementary, MakeUp Ultra Fast, SEUS, Sildur, ProjectLUMA, and Chocapic. All shaders work without errors, and you can get them on our website.
Currently, you can’t use Iris with Forge. The Iris mod is only compatible with Fabric API and Quilt. If you don’t want to play with these mod managers, you can install only the Iris installer and nothing else.
Before you can find a solution, you need to find out what caused the crash. The most likely scenario is that you have an outdated and incompatible shader enabled. A mod can occasionally cause problems as well, but it is very difficult if you are using a MacBook. Apple offers only limited support. One of these things is very likely to have caused Minecraft to crash or your hardware to be too bad.
Most computers and laptops are very complex and differently built. As a result, various components are installed, which is why it is difficult to give a satisfactory answer to this question. Nevertheless, there is some information about the drivers and graphics cards that work with Iris. NVIDIA is the best, followed by AMD and Mesa. The Intel graphics chips cause problems.

When I download Java on my Mac and try to open a file, the option Open with Java doesn’t come up
If ‘Open With Java’ doesn’t appear, right-click the file, choose ‘Open With’ > ‘Other’, then select ‘Java’ manually from Applications > Utilities > Java. You may also need to run it from Terminal using: java -jar filename.jar.”
beautiful shaders
It keeps prompting me that Incompatible mods found!
net.fabricmc.loader.impl.FormattedException: Some of your mods are incompatible with the game or each other!
A potential solution has been determined, this may resolve your problem:
– Replace mod ‘Fabric Rendering Data Attachment (v1)’ (fabric-rendering-data-attachment-v1) 0.3.46+73761d2eb2 with version 0.1 or later that is compatible with:
– fabricloader 0.14.24+local
– Replace mod ‘Fabric Rendering Fluids (v1)’ (fabric-rendering-fluids-v1) 3.1.3+2c869dedb2 with version 0.1 or later that is compatible with:
– fabricloader 0.14.24+local
More details:
– Mod ‘Sodium’ (sodium) 0.5.8+mc1.20.6 requires version 0.1 or later of mod ‘Fabric Rendering Data Attachment (v1)’ (fabric-rendering-data-attachment-v1), which can’t be loaded due to other constraints!
– Mod ‘Sodium’ (sodium) 0.5.8+mc1.20.6 requires version 0.1 or later of mod ‘Fabric Rendering Fluids (v1)’ (fabric-rendering-fluids-v1), which can’t be loaded due to other constraints!
at net.fabricmc.loader.impl.FormattedException.ofLocalized(FormattedException.java:51)
at net.fabricmc.loader.impl.FabricLoaderImpl.load(FabricLoaderImpl.java:194)
at net.fabricmc.loader.impl.launch.knot.Knot.init(Knot.java:146)
at net.fabricmc.loader.impl.launch.knot.Knot.launch(Knot.java:68)
at net.fabricmc.loader.impl.launch.knot.KnotClient.main(KnotClient.java:23)
no idea what any of this means the only mods I downloaded were from the Iris install
Hi Christopher, it looks like you might have incompatible mods in your Minecraft mods folder, possibly for a different version of the game. Try checking that all your mods are compatible with each other and with your current version of Minecraft.
“Une exception Java s’est produite” everytime i try opening with latest java version
“a java exception has occured”
for me its not showing up all i see is a document and not the launcher
This is because your PC is opening Iris with the wrong program. Make a right click on Iris and open the file with Java.
nice
I’ve installed this but the launcher windows 10 version does not show iris installed. I used both the default location and also the windows 10 installer location.
Does this not work on minecraft bedrock?
Hello, the Iris shaders mod works only with Java Edition and not with Minecraft Bedrock.
cool
great however due tyo it needing sodium you can’t use it with forge
Cool
Please create for Android version
I love this mod
This is by far the best options to add shaders. I don’t like OptiFine so that’s great
Java Minecraft