Sometimes, what you get when you pay for a game just isn’t enough. Some people are content with paying for something and feel like they received the entire value of what they paid for. This can be difficult to describe, but sometimes it can feel like after you’ve purchased something, there’s more to it than simply what you can see on the surface. On the topic of getting more than what you paid for, we’d like to introduce you to a fantastic custom shader for Minecraft called the Minecraft Vanilla Plus shaders.
Minecraft shaders are a perfect example of extending the value of a previous purchase you made, as mentioned in the earlier paragraph. Minecraft claims to ship as a complete game, and while this is technically true, there are people who desire even more out of their experiences than what they receive as a final package or service. You don’t ever have to go out of your way to download external tools to enjoy your Minecraft experience, and the game is perfectly fine as a standalone package, but after a while sometimes people just feel like they need something “more”.
Sad Reality about Minecraft Updates
Minecraft was first released over ten years ago. That’s a really long time, and since then the game has been receiving updates. These updates help to give players new things to do, new places to explore, and new ways to express themselves creatively. However, with rare exceptions, these updates don’t usually introduce sweeping changes to the game that dramatically alter the experience. That’s the sad truth about Minecraft updates. An example of a good new feature would be integrated shaders, which Java Edition and PE players would like to see.
However, the reality is that the Mojang development team doesn’t really care about better graphics for Minecraft. Looking back, the release of the MCPE/Bedrock edition with C++ is the biggest innovation ever for the game. Except for that, there are almost never major updates that change the core components of the engine that runs the game. There are of course ways that you can make dramatic changes if you want. That is why we definitely recommend installing add-ons. The best thing to do is to choose a realistic texture pack and download the Vanilla Plus shaders for Minecraft. How to do that will be explained in the download section.
We’ve talked in other reviews about texture packs that can do everything from changing the way the light hits the world, to completely changing the art style of the game to give it a totally unique and fresh experience. Another method are mods, like Biomes O Plenty, which add new biomes. But that’s not what we’re here to talk about in this article.
See, some things don’t need to change all that much. Take your favorite memories, things you’re nostalgic over. These memories may not be perfect, but you probably wouldn’t want to dramatically change the things in your life that you really enjoyed, right? It wouldn’t make any sense too since it already lives in your memory as something that you enjoyed doing or experiencing. Well, if you feel this way, the Minecraft Vanilla Plus shader pack is perfect for you.
What are the Vanilla Plus Shaders?
The shader pack was created on May 22, 2019, and it’s already amassed over one million downloads. If that doesn’t say customer satisfaction, we don’t know what does. The Vanilla Plus shader pack also features a discord which is free to join, and full of people that not only enjoy Minecraft just as much as you do but also full of people who will be happy to help out if you encounter any technical problems throughout your Minecraft shader-installing journey. By the way, the same creator published the Kappa shaders and Nostalgia shaders. If you have low FPS and lags even with Vanilla Plus, download the Potato shaders by RRe36.
There isn’t really too much to explain when it comes to this Vanilla Plus texture pack. Basically, it’s the Minecraft you’ve always loved and enjoyed, only better and more robust. According to the author RRe36, this shader pack is “supposed to look like Vanilla, but…somewhat better”. In case you don’t already know, “Vanilla” is a term given to games that refers to what they were like in their original form. Before any updates or changes were made.
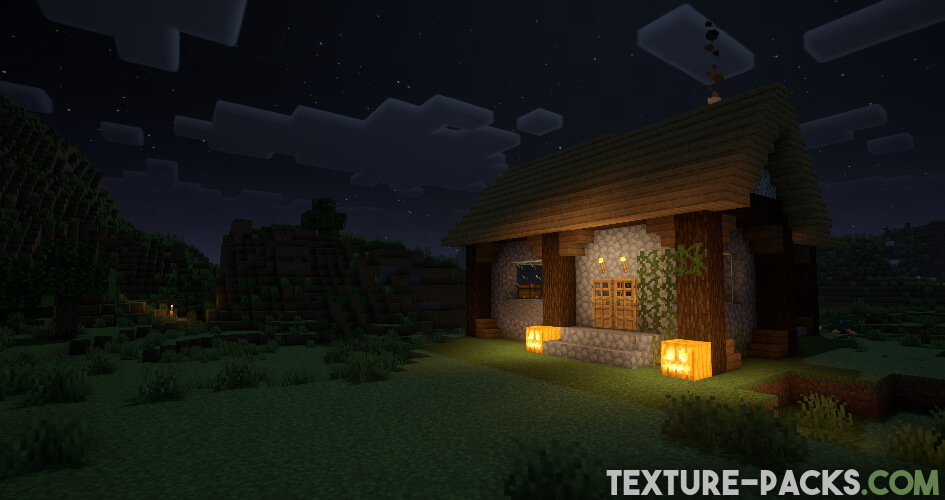
The shader pack’s name isn’t literal, it’s not like it will go back and revert your Minecraft client to a 1.0 build or anything like that. In fact, it’s actually compatible with many new features in Minecraft. The basic idea behind this shader pack is that it’s supposed to look like the Minecraft that you already know you love the look of, but enhance the things about it that already work. The shader also looks good in caves, but it is recommended to set the brightness to 100%. If you don’t, you run the risk of being blown up by a creeper or overlooking diamonds. If you regularly overlook important ores or dungeons, download the XRay texture pack. It allows you to get X-ray vision and make all blocks invisible. However, there is one big drawback. You can’t use XRay together with shaders.
We really like the branding of this shader pack, as many people are afraid to download shader packs with “weird names” that feature words they haven’t seen before. A lot of people new to using shaders might be intimidated by shader packs that are more visually loud and jarring like SEUS, but these more pronounced shader packs can be visually appealing and fun as well. Sometimes, simple is just the best.
Best Features
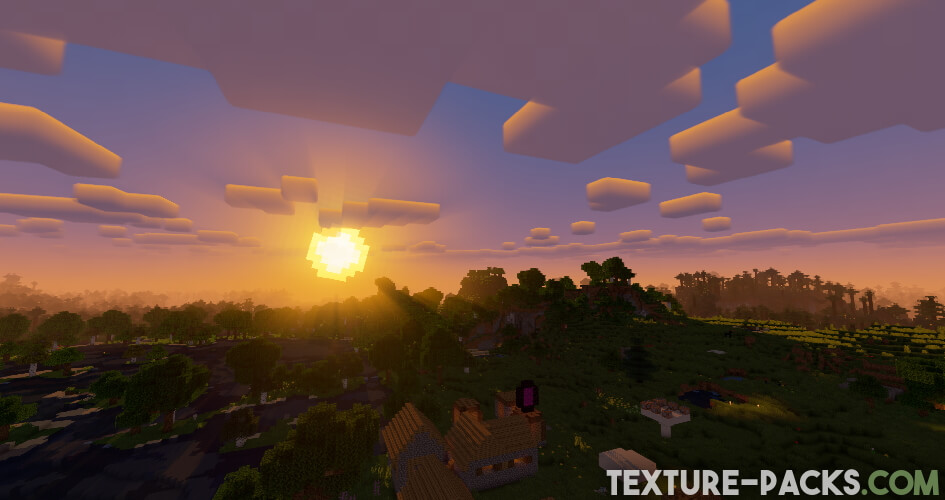
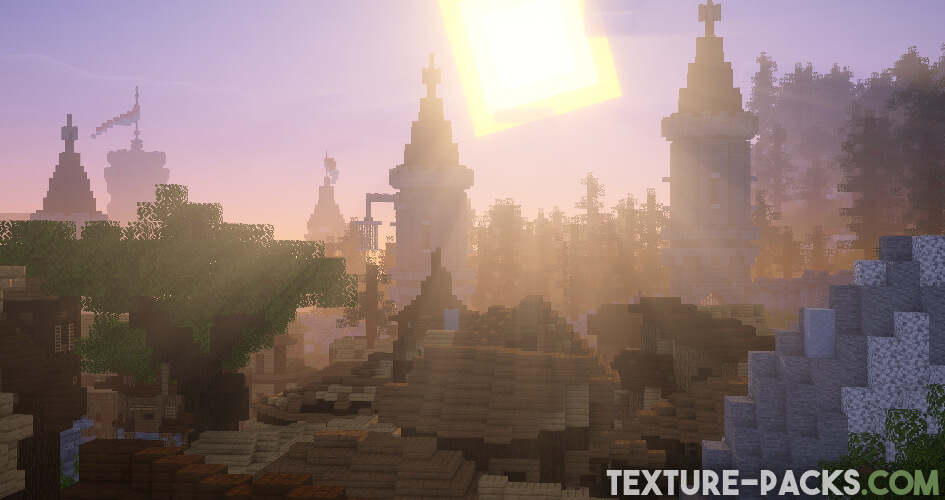
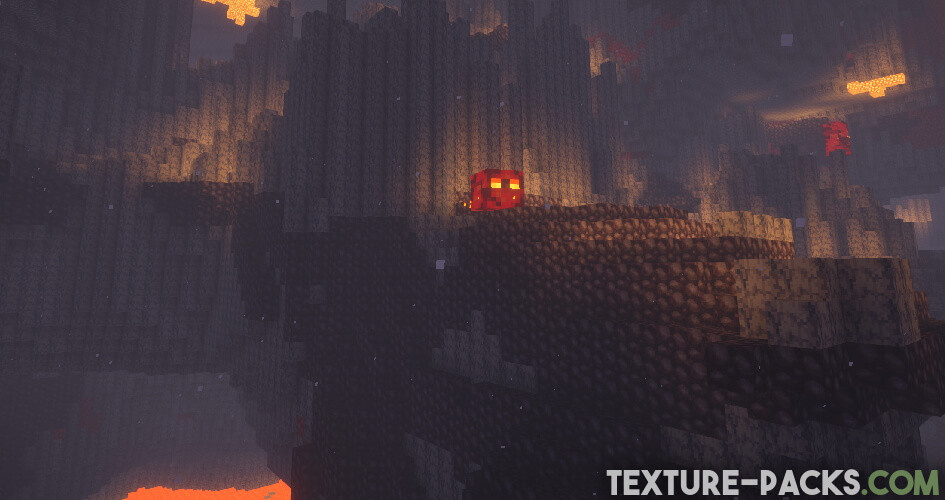
We’ve mentioned it in other articles before, but shader packs usually feature things beyond just shaders that enhance the look of the game. In this case, Vanilla Plus shaders come with dynamic shadows, volumetric clouds, lens flares, motion blur, bloom, god rays, and much more. These are the best features. There are also different visual profile packs that you can download and experiment with if you are curious about what this shader is capable of, with these profile packs doing their very best to emulate what Minecraft felt like back in its early alpha development days.
Everything about this shader is just about perfect because, well, Minecraft as a game is already just about perfect, visually speaking. Millions of people love the way Minecraft looks, and all this Vanilla Plus texture pack serves to do is make the game sparkle and shine even more than it already does.
If any of these sounds appealing to you, definitely check out the Minecraft Vanilla Plus shader, you’ll be glad you did!
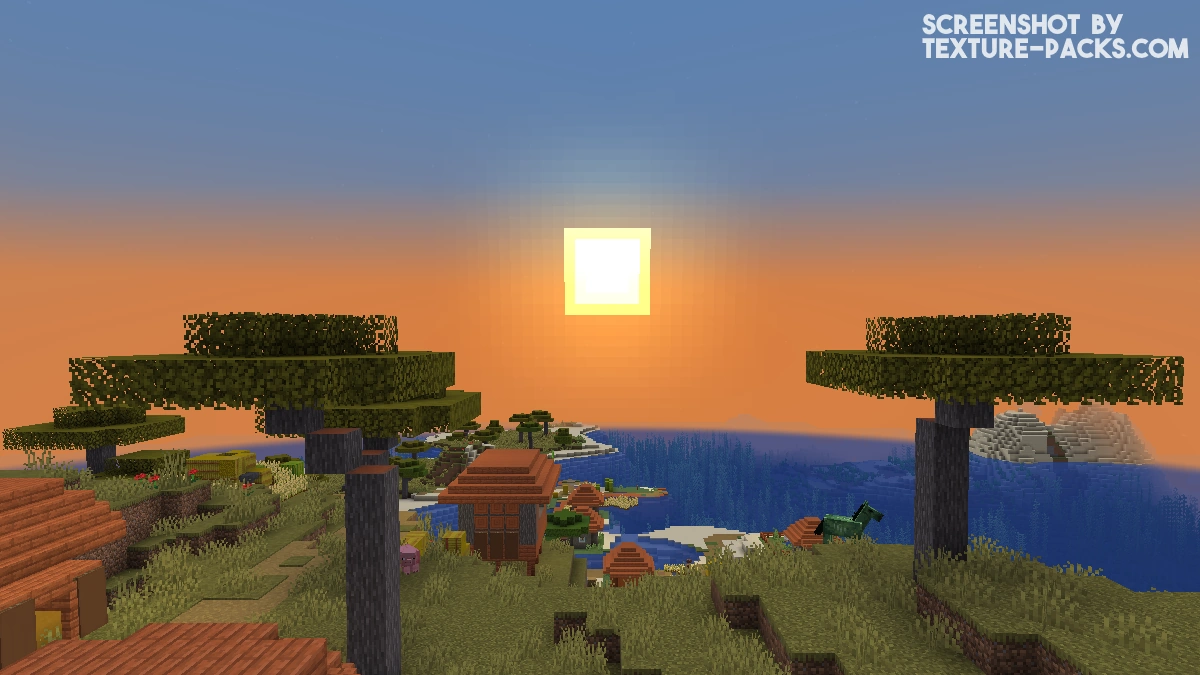
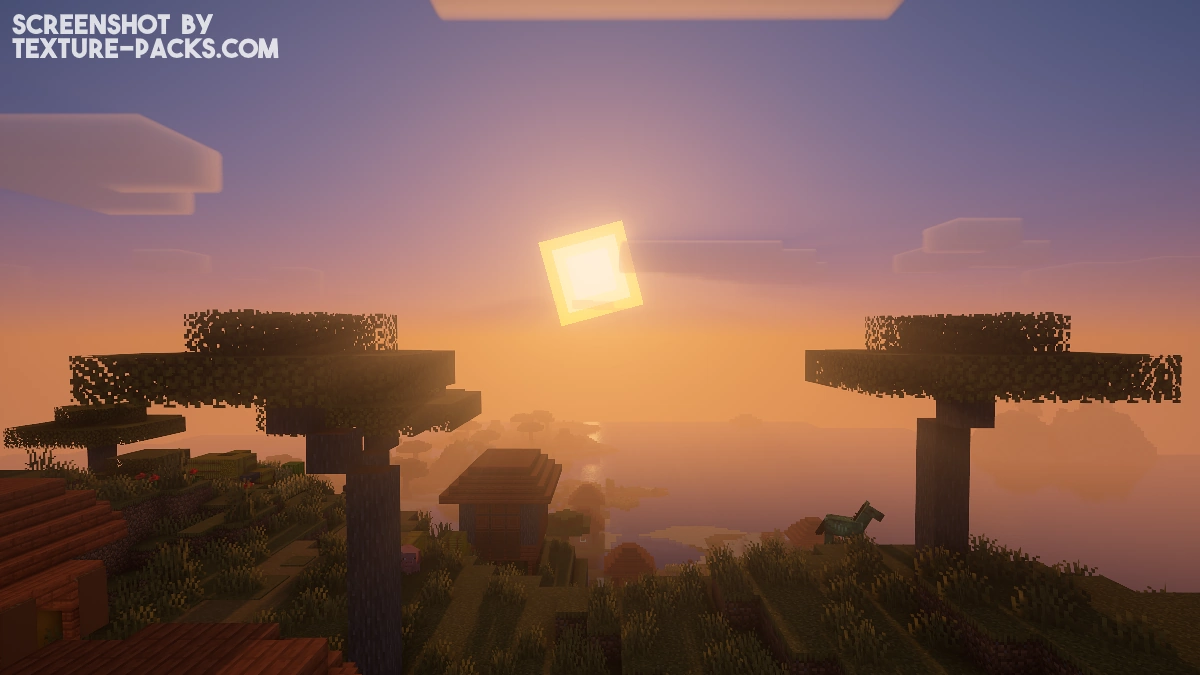
Video & Screenshots


Comparison
Use our comparison tool to compare the Minecraft default pack with Vanilla Plus.
How To Install Vanilla Plus Shaders
Here’s a tutorial on installing Vanilla Plus in Minecraft Java Edition.
- Download the Vanilla Plus shaders for Minecraft from the file section below. Pick the file that matches your Minecraft edition and version.
- Install Iris or OptiFine. The Iris mod is recommended for better performance with higher FPS.
- Open the Minecraft launcher, and choose the Iris or OptiFine profile you just made.
- Launch Minecraft.
- For Iris: Go to "Options", then "Video Settings", and select "Shader Packs". Next, click on "Open Shader Pack Folder" to access the shaderpacks folder. For OptiFine: Navigate to "Options", then "Video Settings", and click on "Shaders." Afterward, click on "Shaders Folder" to open the shaderpacks folder.
- Move the downloaded ZIP file into this folder (.minecraft\shaderpacks).
- In the game, choose the newly installed pack from the shaders list. If you select a shader pack using Iris, its filename will turn yellow.
- Click "Done" or "Apply" and all new features have been loaded.
If you’re new to installing custom shaders in Minecraft, we simply cannot think of a better option for you to try, which is part of the reason why we’re writing this review in the first place. The Minecraft Vanilla Plus shader is extremely popular already amongst Minecraft enthusiasts, however, there are still many people outside of these circles who do not know of its importance.
Vanilla Plus Shaders Download
[26.x – 1.20.x] Download Vanilla Plus Shaders
[1.19.x – 1.18.x] Download Vanilla Plus Shaders
[1.17.x] Download Vanilla Plus Shaders
[1.16.x] Download Vanilla Plus Shaders
[1.15.x] Download Vanilla Plus Shaders
[1.14.x] Download Vanilla Plus Shaders
[1.13.x – 1.8.x] Download Vanilla Plus Shaders

weirdly right after I installed it all and set it up my minecraft menu options are really shrunk down same with my item slots and my inventory menu idrk why though
I can’t put the file in the resource pack section
This is a shader pack and not a resource pack
that are great shaders
Hey, bruh I tried toggle my shaders but it failed to load, I swear I downloaded/installed Iris. Wouldn’t you mind helpin’ me out?
thanks texture-packs.com
it just crashed
I dont have the folder to move the ZIP file into?
The first thing you need to do is install OptiFine. This will create the shader pack folder where you move the ZIP file into.
I want a texture pack that gives me 240 FPS