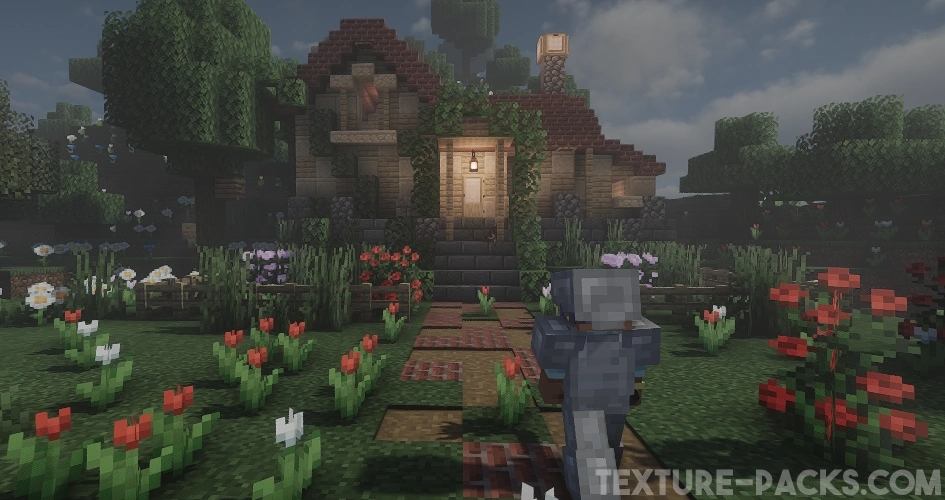
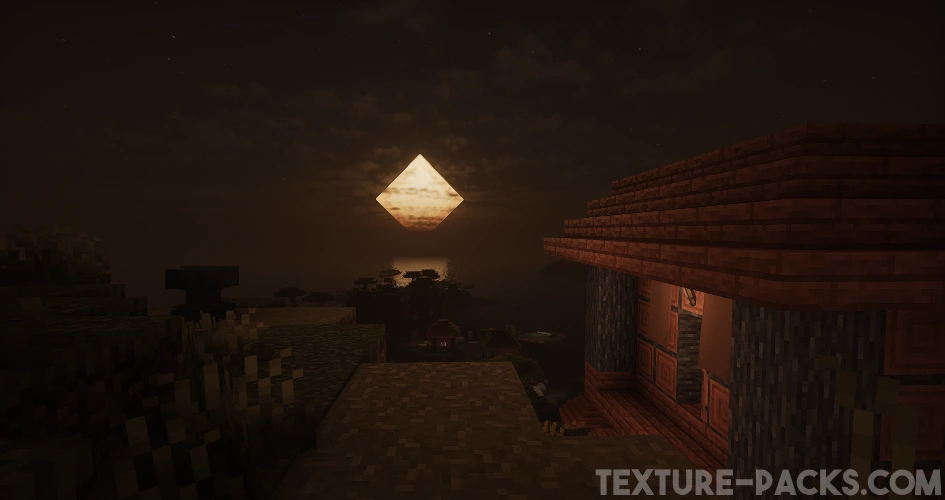
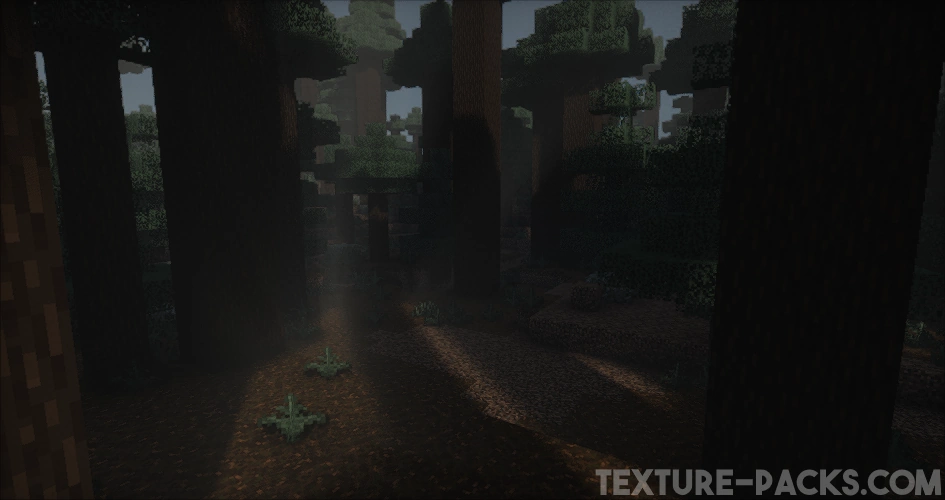
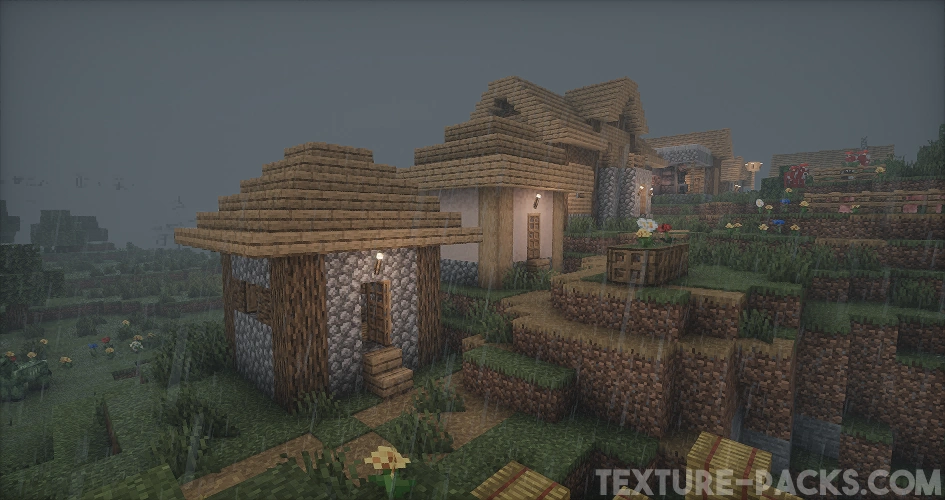
Dark, creepy, and downright terrifying — that’s what the Hysteria shaders are all about. They bring true horror to Minecraft, a game that usually looks like it’s made for kids. Even during the day, it feels like a dark spirit is hanging over the world. Everything looks gloomy and unwelcoming. Thanks to the dynamic weather system, every in-game day feels different and makes your gameplay more exciting. But don’t be a scaredy cat, because things can get really wild if you combine this shader with other spooky mods. In this review, we’re focusing only on the Hysteria shader pack, which we installed using Fabric and Iris.
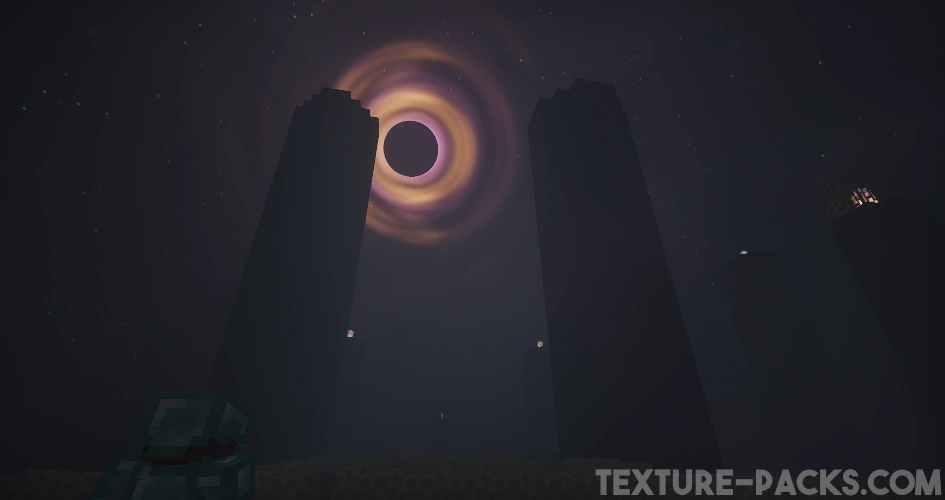
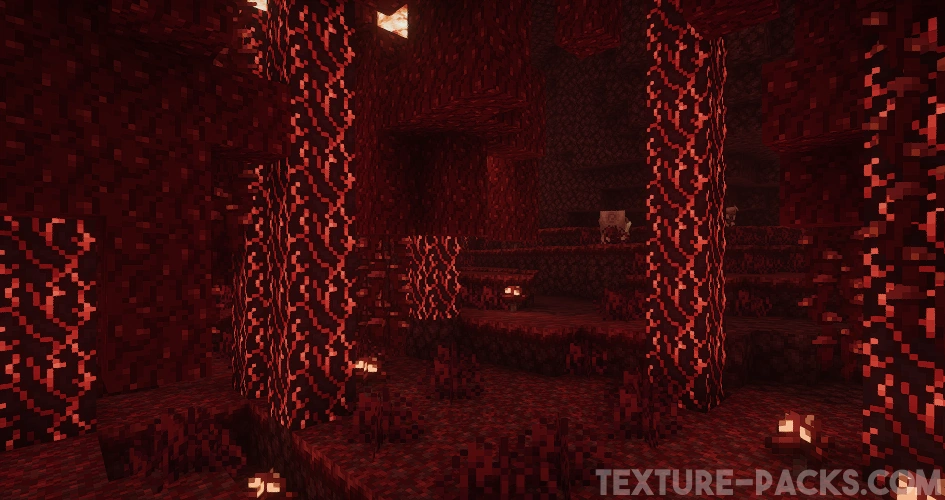
It might sound off-putting at first, but this shader is actually a powerful creative tool. It’s perfect for abandoned castle ruins, YouTube videos, or moody screenshots. You can use it in so many ways. Just be careful, because the constant darkness makes it easy to miss danger. Watch out for holes in the ground and mobs sneaking up on you. Things get even worse in the Nether and the End. Minecraft starts to look more like a black screen than a video game. That’s why we recommend holding a glowing item at all times.
By the way, there’s an older version called Insanity shaders. Hysteria is built on more modern technology and still gets regular updates. It works especially well with zombie texture packs and supports the Distant Horizons mod. Insanity and Hysteria look quite different because Insanity is based on BSL shaders, while Hysteria uses Photon shaders. The developer, ElocinDev, created these horror shaders by building on other existing projects. That’s totally fine, since everything was discussed and approved. It’s nothing like the Iteration shaders, which use stolen SEUS code without permission.
If you don’t like the default settings, you can tweak a lot in the options menu. The easiest way is to use one of the pre-made dark fantasy profiles. In our tests, we liked the “Cinematic” profile the most because it enabled some stunning visual effects. We used a high-end NVIDIA graphics card, so there were no FPS drops. If you have a lower-end GPU, you might experience performance issues. In that case, try using a different profile instead of Cinematic.
If you know what you’re doing, you can go even deeper into the settings. You can adjust the day and night, fog, atmosphere, shadows, and lighting. These are the key settings, but they can be overwhelming for beginners. There are also sliders for brightness and color saturation. For advanced users, there’s a special “Advanced Options” menu where you can customize things even more.
ElocinDev doesn’t just make spooky shaders for Halloween. He also creates regular graphics mods. One of them is the colorful Pastel shaders pack. Make sure to check it out after downloading Hysteria.
Hysteria was published on June 20, 2024 and is compatible with these Minecraft versions: 1.21.8 – 1.21.7 – 1.21.6 – 1.21.5 – 1.21.4 – 1.21.3 – 1.21.2 – 1.21.1 – 1.21 – 1.20.6 – 1.20.5 – 1.20.4 – 1.20.3 – 1.20.2 – 1.20.1 – 1.20 – 1.19.4 – 1.19.3 – 1.19.2 – 1.19.1 – 1.19 – 1.18.2 – 1.18.1 – 1.18 – 1.17.1 – 1.17 – 1.16.5 – 1.16 – 1.15.2 – 1.15 – 1.14.4 – 1.14 – 1.13.2 – 1.13 – 1.12.2 – 1.12 – 1.11.2 – 1.11 – 1.10.2 – 1.10 – 1.9.4 – 1.9 – 1.8.9 – 1.8 – 1.7.10

Video & Screenshots
Comparison
How To Install Hysteria Shaders
- Download the Hysteria shaders for Minecraft from the file section below. Pick the file that matches your Minecraft edition and version.
- Install Iris or OptiFine. The Iris mod is recommended for better performance with higher FPS.
- Open the Minecraft launcher, and choose the Iris or OptiFine profile you just made.
- Launch Minecraft.
- For Iris: Go to "Options", then "Video Settings", and select "Shader Packs". Next, click on "Open Shader Pack Folder" to access the shaderpacks folder.
For OptiFine: Navigate to "Options", then "Video Settings", and click on "Shaders." Afterward, click on "Shaders Folder" to open the shaderpacks folder. - Move the downloaded ZIP file into this folder (.minecraft\shaderpacks).
- In the game, choose the newly installed pack from the shaders list. If you select a shader pack using Iris, its filename will turn yellow.
- Click "Done" or "Apply" and all new features have been loaded.
Hysteria Shaders Download
[1.21.X – 1.7.X] [Iris] Download Hysteria Shaders
[1.21.X – 1.7.X] [OptiFine] Download Hysteria Shaders
spoopy
good