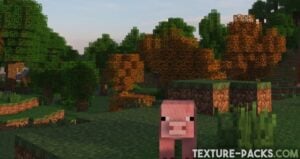
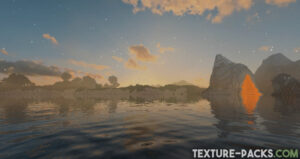
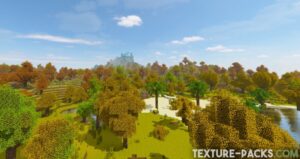
Minecraft is a game that’s just full of surprises. Take the graphics of Minecraft, for example. Many people will take a quick look at Minecraft and not assume it’s capable of much. For some people, the pixelated retro aesthetic of this game can be off-putting. This is understandable, but there’s something many people don’t understand about how Minecraft can look. What those people don’t know is how good Minecraft is capable of looking with the right know-how. Vanilla Minecraft, or in other words, Minecraft with no modifications whatsoever, looks alright. The default shaders Minecraft ships with look pretty good these days, but they aren’t built for beauty; they’re built for performance. And if you’ve got an ultra-powerful PC, chances are you don’t need any more performance optimizations, and you want something more. Anyways, I want to take this space to talk about one of my favorite shaders of all time: SORA shaders. You can get these shaders for free in our download section.
Let me back up here for a moment and explain what a shader actually is. With all video games, the word “shader” refers to how light is processed within the in-game world. Lights in games, just like in real life, can be modified in a number of different ways. A foggy day will reduce the amount of light that comes in, and it also tends to scatter the light, which creates a more diffused look. Or, if the light hits the surface of a hard rock, it is going to refract off of that rock in a completely different way than it would if it was aimed at, let’s say, a glass window or a lake.
Light in games, just like in real life, is actually incredibly complicated. When you take a light source like the sun, you’re actually dealing with many little light sources going in all different directions forward. It’s part of the reason why people look so much better in photographs when lit by the sun than they do when lit by something like the halogen lights of a gas station at night. There’s a wide variety of light and ways it’s interpreted by its surroundings, but that’s a topic for another day.
Minecraft comes with default shaders pre-installed that will take the light in-game and figure out what to do with it in a way that makes sense and looks nice enough, but it really isn’t designed to look good. The primary goal of the default light shaders is to make sure Minecraft looks “good enough” while being able to maintain the best performance possible. It’s a compromise, mainly for lower-end computers that aren’t capable of being able to output amazing graphics.
Also, one quick note here, if we’re being technical, we aren’t just downloading shaders. We’re downloading a sort of “beautification pack” that mostly affects how light is processed, but these shader downloads often come with lots of nice bonuses that base Minecraft doesn’t have. The most noticeable of which being the way you’ll see the in-game water shimmer to simulate a real pool of water or the slight movement you’ll see in bushes and trees from the in-game wind. These bonuses aren’t technically considered part of a “shader”, but it doesn’t really matter. When you hear “shader” just think “it makes everything look better”
If you’ve got a computer or mobile phone that’s just begging for better visuals than what you get with base Minecraft shaders, keep reading.
You might be wondering if there are ways to get Minecraft to look better than it already does. Well, if you’ve already got a PC that’s outputting the best graphics that base Minecraft can put out, the next logical thing to do to get those sweet graphics is to check out some of the amazing free shaders that you can download for Minecraft. The one restriction to getting a custom shader for Minecraft is that it’s restricted to Minecraft on PC and mobile devices. There may be some advanced ways you can get shaders to work on consoles, but generally speaking, it is much easier and more widely understood that custom shaders are a treat that high-end computer users get to enjoy.
Part of the reason I like the SORA shader pack so much is that they just feel so natural to me to use. There are other shaders out there of course, but I tend to be put off by some of the other ones. Why’s that? Well, call it a matter of personal preference, but I honestly just think that the other shaders try too hard. What do I mean by this?
Well, to me, Minecraft is Minecraft. At the end of the day, it’s a blocky world, and it should have light that reflects that reality. SORA shader is so good at reflecting what the real world would feel like if it was in Minecraft if that makes any sense. When I look at some of the other shaders out there, it just feels off to me.
Best Features
I really like the way the SORA shaders make Minecraft look. It’s sort of like a real-life version of Minecraft. If we compare them with, let’s say, projectLUMA, LUMA doesn’t look “bad” per se, but it’s just a tad overdone for my liking. There’s too much bloom with LUMA, and it sort of tends to make everything look “too” good all the time. SORA has a sort of grittier look to it, but it’s very subtle.
SORA has some of the nicest blue skies I’ve seen for a shader, and when you take a look at the air around you, there’s a definite sort of diffused lighting that scatters in the air in front of you. Imagine you’re in real life (shocking I know), and you look across a vast landscape. Chances are, you aren’t going to just see forever because the light is going to get caught in the air in front of you, among other things that will get in your way. It’s all very complex in real life, but basically, just know that being able to see trace amounts of fog in front of you in video games will make for a much more natural and relaxing experience.
There are also custom color profiles that the SORA shader now supports as of the 1.14 update. These are all very cool color palettes that you can set Minecraft to run to, and it’s nice if you want to achieve a certain look. For example, the “Firewatch” profile creates this really nice mood that sort of makes the game resemble this late-in-the-day sunset effect. Definitely check some of these out, I promise you it’s worth your time.
Anyways, my apologies if my thoughts sound a bit abstract here. It’s hard for me to verbalize why I think SORA shaders are the best ones for Minecraft at the current moment, but at the end of the day, it just boils down to this sort of nice realism that doesn’t look like it’s trying to be a dramatic superhero movie with overblown colors. And when compared to base Minecraft, it’s not even a contest. SORA is the clear winner here, and I think if you give it a look you’ll come to the same conclusion that I did.
SORA was published on June 18, 2020 and is compatible with these Minecraft versions: 1.21.7 – 1.21.6 – 1.21.5 – 1.21.4 – 1.21.3 – 1.21.2 – 1.21.1 – 1.21 – 1.20.6 – 1.20.5 – 1.20.4 – 1.20.3 – 1.20.2 – 1.20.1 – 1.20 – 1.19.4 – 1.19.3 – 1.19.2 – 1.19.1 – 1.19 – 1.18.2 – 1.18.1 – 1.18 – 1.17.1 – 1.17 – 1.16.5 – 1.16 – 1.15.2 – 1.15 – 1.14.4 – 1.14 – 1.13.2 – 1.13 – 1.12.2 – 1.12
Video & Screenshots


How To Install SORA Shaders
- Download the SORA shaders for Minecraft from the file section below. Pick the file that matches your Minecraft edition and version.
- Install Iris or OptiFine. The Iris mod is recommended for better performance with higher FPS.
- Open the Minecraft launcher, and choose the Iris or OptiFine profile you just made.
- Launch Minecraft.
- For Iris: Go to "Options", then "Video Settings", and select "Shader Packs". Next, click on "Open Shader Pack Folder" to access the shaderpacks folder.
For OptiFine: Navigate to "Options", then "Video Settings", and click on "Shaders." Afterward, click on "Shaders Folder" to open the shaderpacks folder. - Move the downloaded ZIP file into this folder (.minecraft\shaderpacks).
- In the game, choose the newly installed pack from the shaders list. If you select a shader pack using Iris, its filename will turn yellow.
- Click "Done" or "Apply" and all new features have been loaded.
SORA Shaders Download
Java Edition:
[1.21.X – 1.17.X] Download SORA Shaders
[1.16.X] Download SORA Shaders
[1.15.X – 1.12.X] Download SORA Shaders

nice
thx for the shaders 🙂
nice
🥰
The SORA shaders are excellent and I want them now. My daughter likes Minecraft a lot and she wanted SORA. Thank you💖