DrDestens Shaders 1.20, 1.20.5 → 1.19.4

Author DrDesten
Downloads971.9K
Updated
Supported GPUs
Loaders
Progress
100%


ADVERTISEMENT

In this article, we’ll dive deep into the mesmerizing details of DrDestens shaders for Minecraft, from its exceptional compatibility with various hardware setups to the multitude of features that will captivate your senses. We’ll also share tips and tricks on how to optimize your FPS and what are the best settings for this pack.

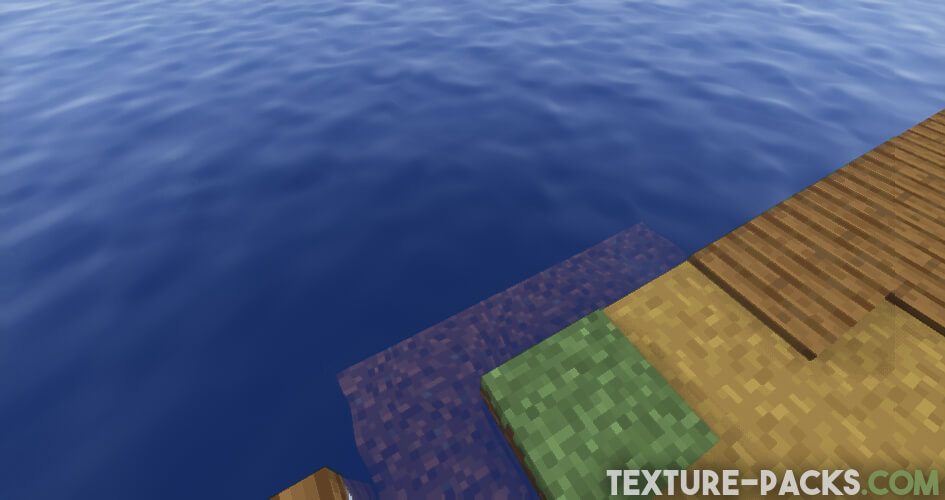
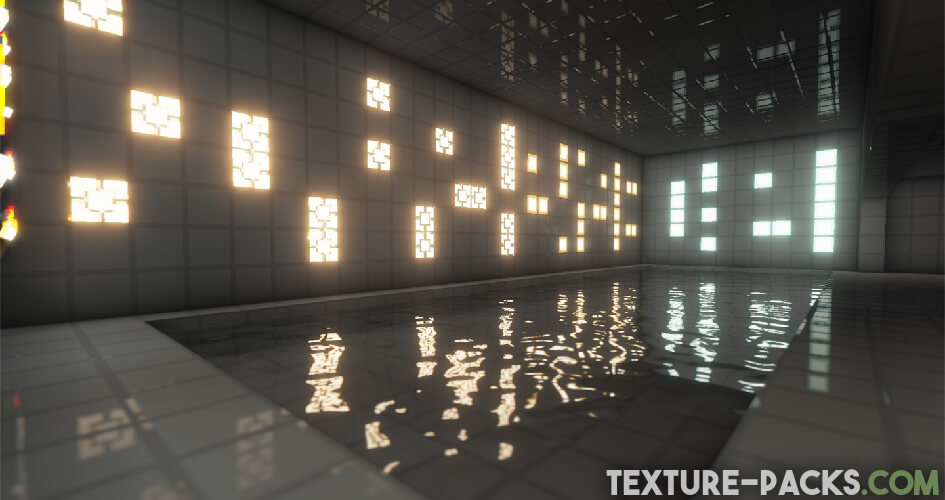
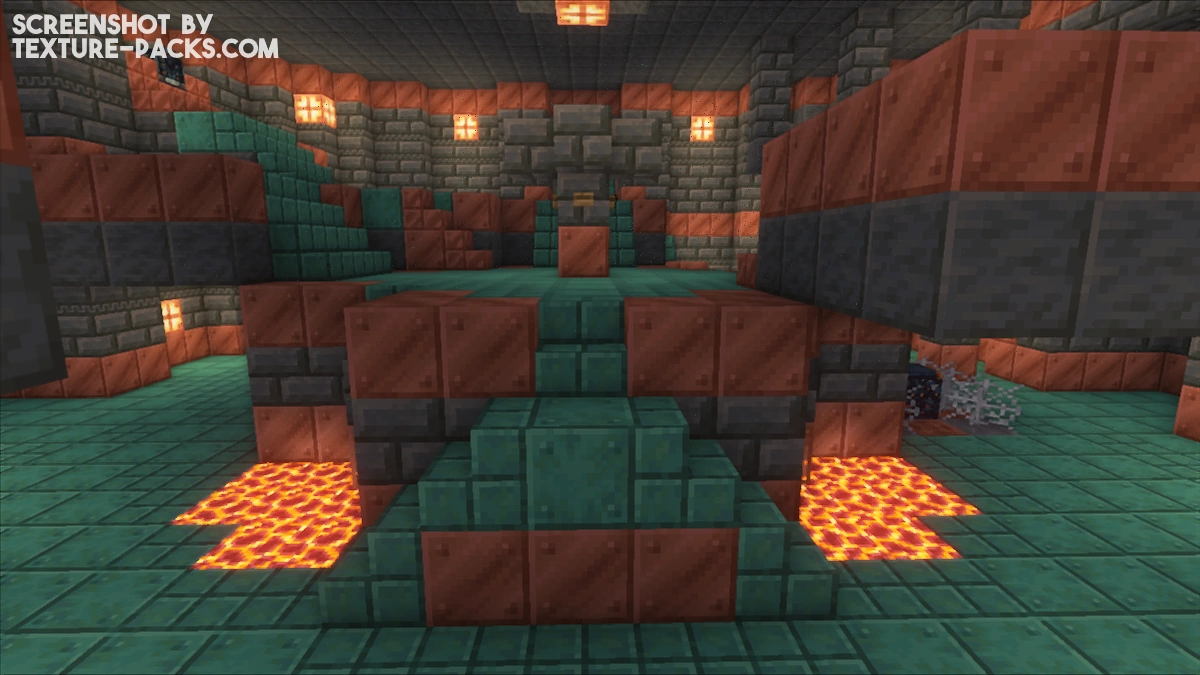
Now, let’s dive into the unique aspect of this project. Unlike most Minecraft shaders that add shadows to your environment, DrDestens shaders take a different approach. They prioritize performance and compatibility with older hardware, which is why you won’t find shadows in this shader pack. While this might be unusual, it ensures that you can enjoy the shaders even if you’re using lower-end computers and laptops.

Best Settings for DrDestens Shaders

If you’re aiming for a high FPS with DrDestens shaders, we have some recommended settings for you. In the Minecraft shader options, select the “Low” profile. This will optimize your performance. Additionally, make sure to disable a few features such as PBR, POM, Godrays, Bloom, and DoF. By doing so, you’ll ensure a buttery-smooth gameplay experience.

Let’s talk more about performance. DrDestens shaders are designed to run with almost every graphic card, including integrated graphics, but please note that Mac and Intel cards are not supported. If you’re using an Apple M1 Mac, you might encounter some issues with certain shader features. The developer is unable to fix this problem, but you can try disabling the troublesome features by deleting specific files in the DrDestens MCShaders folder on your PC. Despite working with a tight performance budget, the author is dedicated to refining the shaders to run seamlessly on bad computers.

Information about the Developer

Furthermore, you should appreciate the developer behind this remarkable project. DrDesten initially started developing these vanilla shaders as a way to learn the programming language GLSL (OpenGL Shading Language). However, his passion for programming extends beyond shaders, and he possesses expertise in HTML/CSS/JS, Python, and even some C/C++. This diverse skill set contributes to the continuous improvement of the DrDestens shader pack.

Updates for DrDestens shaders are meticulously crafted, sometimes taking more than a year to ensure perfection. In fact, the developer even rewrote the entire post-processing pipeline and implementation in one update, showcasing their unwavering commitment to delivering large quality and performance improvements.

ABOUT PROJECT

DrDestens is compatible with these Minecraft versions: 1.21 – 1.20.5 – 1.20.4 – 1.20.3 – 1.20.2 – 1.20.1 – 1.20 – 1.19.4 – 1.19.3 – 1.19.2 – 1.19.1 – 1.19 – 1.18.2 – 1.18 – 1.17.1 – 1.17 – 1.16.5 – 1.16 – 1.15.2 – 1.15 – 1.14.4 – 1.14 – 1.13.2 – 1.13 – 1.12.2 – 1.12 – 1.11.2 – 1.11 – 1.10.2 – 1.10 – 1.9.4 – 1.9 – 1.8.9 – 1.8

Video & Screenshots

Comparison

Use our comparison tool to compare the Minecraft default pack with DrDestens shaders.
DrDestens shaders compared to Minecraft vanilla (before)DrDestens shaders compared to Minecraft vanilla (after)

How to install the DrDestens Shaders

Check out the easy steps to install everything with just a few clicks.
  1. Download the DrDestens shaders for Minecraft from the file section below. Pick the file that matches your Minecraft edition and version.
  2. Install Iris or OptiFine. The Iris mod is recommended for better performance with higher FPS.
  3. Open the Minecraft launcher, and choose the Iris or OptiFine profile you just made.
  4. Launch Minecraft.
  5. For Iris: Go to "Options", then "Video Settings", and select "Shader Packs". Next, click on "Open Shader Pack Folder" to access the shaderpacks folder.
    For OptiFine: Navigate to "Options", then "Video Settings", and click on "Shaders." Afterward, click on "Shaders Folder" to open the shaderpacks folder.
  6. Move the downloaded ZIP file into this folder (.minecraft\shaderpacks). The filename is something like "DrDestens+MinecraftShaders+v2.0.2.zip".
  7. In the game, choose the newly installed pack from the shaders list. If you select a shader pack using Iris, its filename will turn yellow.
  8. Click "Done" or "Apply" and all new features have been loaded.

DrDestens Shaders Download


ADVERTISEMENT
None of the files are hosted on our server. All direct download links on our website are provided by the authors. The packs are free of viruses. Therefore, they are completely safe and secure.
Please share this post on social media.
Are there any thoughts you’d like to share? Please write a comment and rate the pack to help the authors.

DrDesten is the author. Rate this pack:
4.5/5 - (50)

How many FPS do you get with the pack? Choose one of the following answers.

DrDestens Shader Pack Features

DrDestens shaders offer an array of over 30 new features, each carefully coded to enhance your Minecraft world. From custom sky gradients to various water effects, the best of the best is included in this pack. Despite all these incredible features, the file size is just about 100 KB, ensuring a smooth download and installation process.

Depth of Field (DoF) in DrDestens Shaders

The depth of field feature mimics the behavior of a real camera by selectively blurring non-focused objects. With DoF enabled, you can achieve a more cinematic look in Minecraft. Adjust the settings to find the perfect balance between focus and blur for your preferred aesthetic.

Bokeh Samples:

Bokeh samples determine the quality of the blur effect in depth of field. Higher sample counts result in smoother and more realistic bokeh. However, keep in mind that increasing the sample count may impact performance, so find the right balance based on your system’s capabilities.

DoF Intensity:

The DoF intensity setting allows you to control the strength of the depth of field effect. Increase the intensity for a pronounced blur or decrease it for a more subtle effect. This feature has a low impact on performance.

Maximum Blur:

The maximum blur setting limits the strength of the depth of field blur effect. By adjusting this setting, you can prevent excessive blurring and reduce artifacts, particularly when using lower sample counts. It’s recommended for maintaining optimal gameplay and reducing distractions.

DoF Downsampling Amount:

The DoF downsampling amount controls the level of downsampling applied to the depth of field effect. Downsampling helps reduce artifacts but can also increase pixelation. This setting has a minimal performance impact.

Far Blur Only:

Enabling the far blur only option restricts the depth of field effect to distant objects, leaving nearby elements sharp and in focus. This can provide a unique visual style and enhance depth perception in Minecraft.

Sample Rejection:

Sample rejection improves the quality of depth of field by removing color bleeding artifacts. Enabling this option can significantly impact performance, so consider your system’s capabilities before using it extensively.

Reflections in DrDestens Shaders

DrDestens shaders offer two different modes for Screen Space Reflections (SSR): Raytraced and Flipped Image. Raytraced mode delivers higher-quality reflections, while Flipped Image mode provides a more performance-friendly alternative.

Raytracing Quality:

For SSR in raytraced mode, you can adjust the raytracing quality to control the number of raytracing iterations. Lower values result in faster performance but may exhibit reduced reflection quality. Experiment with different settings to find the balance between visual fidelity and performance.

Thickness Estimation Modifier:

The thickness estimation modifier influences how DrDestens shaders estimate the thickness of each pixel during reflections. Adjust this setting if you encounter blind spots or other reflection issues. It has no performance impact and allows you to fine-tune the reflection accuracy.

Fade Edges:

The fade edges option softens the edges of reflections. This can help reduce reflection artifacts and create a smoother transition between reflected and non-reflected areas.

Reflection Threshold (PBR Only):

When using physically based rendering (PBR), the reflection threshold sets the minimum required reflectiveness for SSR to activate. Higher values may introduce reflection cutoffs, so adjust this setting to ensure optimal reflection coverage in your Minecraft world.

Screen Space Refraction:

Screen space refraction distorts objects seen through water, adding a realistic effect to submerged elements. Enable this feature to enhance the visual fidelity of underwater environments.

Refraction Strength:

Adjust the refraction strength to control the intensity of the refraction effect. Higher values produce more pronounced distortions, while lower values create a subtler effect.

Glass Reflections:

Glass reflections add reflective properties to tinted glass blocks, making them more visually appealing. Enable this feature to see reflections and vibrant colors come to life in your Minecraft structures.

Water in DrDestens Shaders

DrDestens Shaders offer a range of options to make water more realistic in Minecraft.

Waves and Bump Mapping:

Enable waves and bump mapping to add physical wave effects and add additional detail to water surfaces. Adjust the wave height, bump amount, and bump size to customize the appearance of waves and the level of surface detail.

Water Absorption Density and Bias:

Water absorption density controls the density of fog within the water, simulating realistic underwater visibility. Adjusting the water absorption bias can help in making water more visible by adding a constant value to the water fog distance.

Water Texture:

Enable the water texture option to use the vanilla water texture, retaining the familiar aesthetic of Minecraft’s default water appearance.

Water Color Options:

Take control of the water’s appearance by adjusting the water absorption color and absorption color multiplier settings. Modify these values to create vibrant or more subdued watercolors that align with your desired atmosphere.

Physically Based Rendering (PBR) in DrDestens Shaders

PBR brings a new level of realism to Minecraft by simulating the interaction of light with materials in a physically accurate manner. Choose the LabPBR 1.3 or SeusPBR/OldPBR format, and adjust the PBR texture pack resolution based on the textures used in your Minecraft world.

PBR Blend:

The PBR blend setting allows you to fine-tune the balance between PBR rendering and Minecraft’s vanilla rendering style. Increase the value for a stronger PBR effect or decrease it for a more subtle integration with the vanilla look.

Height as AO:

By utilizing the height information for ambient occlusion (AO), this feature enhances shading. Enable it to achieve a more realistic lighting environment.

Normal Mapping Fix:

Enable the normal mapping fix if normal maps are not properly displaying on entities or handheld objects. This setting ensures that normal maps render correctly, providing enhanced visual detail.

Use Hardcoded Metals (LabPBR Only):

When using LabPBR, enabling the Use Hardcoded Metals option allows the shader to use reflectance data instead of color for metallic materials. This further enhances the realism and accuracy of PBR rendering.

Subsurface Scattering (SSS):

SSS simulates the diffusion of light within translucent objects, adding a subtle glow and enhancing the appearance of materials like leaves, skin, and more. Enable SSS to achieve a more realistic Minecraft gameplay with DrDrestens shader pack.

Parallax Occlusion Mapping (POM) in DrDestens Shaders

POM, or Parallax Occlusion Mapping, provides an extra layer of depth and detail to blocks using height maps. Adjust the following settings to achieve the desired effect.

POM Depth:

Specifies the depth of the POM effect. Higher values will create more pronounced depth but may introduce artifacts. Experiment with different values to find the perfect balance.

POM Distortion:

Controls the exaggeration of the height map. This option helps create more depth, especially when working with small POM Depth values. Be cautious when using high POM Depth values, as it may result in artifacts.

Smooth POM:

Enabling smooth POM helps reduce artifacts and produces smoother transitions in the height map. This feature significantly enhances visual quality and reduces distractions.

Ambient light multiplier:

The ambient light multiplier setting allows you to adjust the intensity of the ambient lighting in Minecraft. By modifying this value in the DrDrestens shaders settings, you can control the overall brightness and atmosphere of your surroundings.

Camera and Tonemapping in DrDestens Shaders

Fine-tune the camera and tonemapping effects to achieve the desired visual style for your Minecraft experience. The following settings can be adjusted.

Exposure:

Control the overall exposure of the camera. Increase the value for a brighter scene or decrease it for a darker ambiance.

Tonemapping:

Choose between custom reinhard or unreal tonemapping methods, each providing a different color grading style.

Contrast, Vibrance, Saturation, and Brightness:

These settings allow you to fine-tune the color balance and appearance in the DrDestens texture pack.

Vignette:

The vignette effect darkens the screen borders, adding a subtle vignette to the gameplay. Choose between round or square vignette styles and adjust the vignette strength to achieve the desired intensity.

Chromatic Aberration:

Enable chromatic aberration to introduce color diffraction, creating a visual effect where colors slightly separate at the edges of objects.

Post Processing in DrDestens Shaders

Further enhance your visuals with the following post-processing options:
  • TAA (Temporal Anti-Aliasing): Enable TAA to smooth edges and reduce jagged lines at the cost of a slightly blurrier image. Note that TAA might cause issues with OptiFine’s high-resolution screenshot feature.
  • TAA Options: Adjust the TAA Blending Constant to control the opacity of the current frame, and fine-tune the TAA Sharpening effect to customize the level of image sharpening.
  • Bloom: Create a beautiful glow effect around bright objects in your Minecraft world. Experiment with the Bloom Strength setting to achieve the desired level of glow.
  • Motion Blur: Enable Motion Blur to introduce a sense of movement and fluidity to your gameplay. Adjust the Motion Blur Intensity to control the strength of the effect.

SSAO (Screen Space Ambient Occlusion)

Enable SSAO to add depth and darkness to cavities and crevices. Note that SSAO has a high performance impact and may require adjustments based on your system’s capabilities. You can fine-tune the SSAO quality and strength settings to achieve the desired balance between visual fidelity and performance.

Atmospherics

Atmospherics settings allow you to customize the fog and atmospheric effects in your Minecraft world:
  • Fog: Choose between different fog modes, including OFF, normal, and border.
  • Fog Amount: Adjust the fog amount to control the density and visibility of the fog.
  • Morning Fog: Enable morning fog to increase the fog amount during sunsets. Adjust the morning fog strength to control the intensity of the effect.
  • Cave Fog: Adjust the cave fog brightness to control the visibility and intensity of the fog in caves.

Godrays

Enable godrays to bring a stunning visual effect to your Minecraft world. Godrays simulate the scattering of light and add an ethereal touch to your surroundings. Customize the godray colors, strength, and radius to achieve the desired impact.

Sky Colors

Take control of the colors of your Minecraft sky with the sky color settings. Adjust the values for different times of the day, including sky day, sky sunset, sky night, end sky upper, end sky lower, and more. Customize the colors to create breathtaking skies that match your preferred atmosphere and aesthetic.

Weather

Fine-tune the weather effects in your Minecraft world with the weather settings. Adjust the rain opacity, rain refraction strength, and rain detection parameters to achieve the desired rain appearance. Experience the immersive beauty of Minecraft’s changing weather conditions.

Other Stuff

  • Outline: Customize the outline of blocks, selecting colors such as white, black, or rainbow. Adjust the outline distance to control the thickness of the outline.
  • Block Selection Outline: Enable this feature to add an outline to selected blocks. Choose between black, white, or rainbow outlines.
  • Wavy Blocks and Wavy Leaves: Add dynamic movement to blocks and leaves, creating a more realistic and immersive environment.
  • World Curvature: Enable world curvature to introduce a slight curvature to the world, adding a unique and surreal touch.
  • Hand Invisibility Effect: When enabled, the hand invisibility effect distorts handheld objects when they are invisible, adding a visually intriguing element.
  • White World: Enable the white world to transform your Minecraft world into a white and minimalist aesthetic, offering a fresh and unique visual experience. It’s similar to the Black and White texture pack.
  • Directional Lightmaps: Enable this feature to apply normal mapping to dynamic lights. Requires a resource pack with PBR support. Adjust the directional lightmap strength to control the intensity of the effect.
  • Dynamic Light Brightness: Customize the brightness of light emitted by emissive blocks to achieve the desired illumination level.
SUPPORT THE AUTHOR(s)

Leave a Comment

5 Comments

    • Oh WOW! That shader pack is just really amazing!
      You should make more, and make them like either more fantasy, or more realistic, because those other shaders are so amazing and you should just make more.

      Make your shader packs have an Easter Egg, where on the back of a painting there will be a mom eating toe soup.

      Reply