A majority of Minecraft fans play the Bedrock Edition and MCPE due to its seamless performance on consoles, mobile phones, and tablets. Moreover, it facilitates cross-platform play, allowing interaction with the entire MC community. This guide will show you how to port Java texture packs to MCPE and Bedrock completely for free online. So you won’t have to spend any money. We’ll guide you through the converting process without requiring additional software installation.
We wrote this article because a significant disparity exists compared to the Java Edition. As you know, if you are in the Marketplace, you can access various textures and more community content, but they come at a cost and not a small one. The most popular packs are exclusively available through the official shop. This becomes particularly frustrating when considering that the same packs are freely available on PC. Approximately 1000 Minecoins cost six dollars, meaning you’d have to spend several dollars for a single pack. That’s a lot for something you might not even end up liking and there is no provision for canceling such transactions.
While some might be willing to invest in the Marketplace add-ons and mods, we believe in empowering users with the knowledge and tools to achieve the same results without a hefty price tag. We have the optimal method for porting Java texture packs to the MCPE and Bedrock Edition, providing you with access to countless creations from the Minecraft community without any financial burden. This way, you can freely explore and experiment with new textures.
1) How To Convert Texture Packs to MCPE and Bedrock
We’ve created a video tutorial on how to convert a texture pack from Java to MCPE and Bedrock. Watching the steps in action can be incredibly helpful, especially for those who are new to converting or porting resource packs. Click the video below!
If you appreciate a guide on how to port Java texture packs to MCPE and Bedrock complemented by numerous screenshots, look no further! Beneath this paragraph, a comprehensive tutorial awaits, filled with detailed, step-by-step instructions.
2) Online Converter
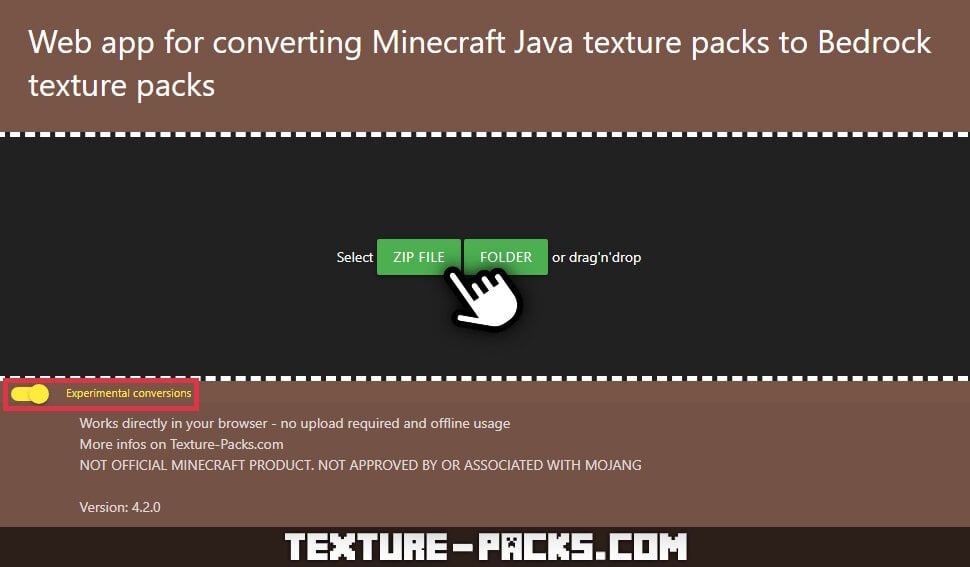
To convert a Java texture pack to Bedrock/MCPE, we’ll use a completely free online service. Allow us to introduce the online converter web app, a user-friendly platform for Minecraft players. Please open the web app in a new tab in your browser. With this site, you can effortlessly port textures within moments. All blocks, items, entities, icons, mob effects, and Hotbar textures from your uploaded Java pack will seamlessly convert into a format compatible with Minecraft PE.
Ensure that your browser is supported for the optimal functioning of the tool. Desktop compatibility has been confirmed with leading browsers including Chrome, Firefox, Safari, Opera, and Microsoft Edge. Please note that Internet Explorer is not supported due to its outdated code. For mobile users, successful tests were conducted on iOS (Safari) and Android (Chrome).
Not Supported Features:
Please be aware that there is no guarantee that the conversion process will work flawlessly. Each resource pack is unique, and compatibility may vary. Some packs might not work at all, while others may only partially convert.
Certain features, such as Minecraft shaders, OptiFine, 3D textures, mods, data packs, custom models, and fonts, are not supported. Only classic Vanilla textures are compatible. Snapshots or newer major updates released after 2023 might not be supported, and in cases where sprites’ textures (e.g., banner patterns, paintings, and particles) are only partially available, the missing parts will be transparent.
Regrettably, this online tool to convert Java texture packs exclusively applies to the standard Minecraft Pocket Edition for mobile devices and the Windows Edition. The limitation arises from the inability to install texture mods directly from the internet on game consoles. A workaround involves connecting your phone or tablet to your TV using an HDMI cable, providing the option to play on a larger screen.
3) Choose a Pack
Now, choose a pack from our well-researched Minecraft texture packs list and download it. It’s crucial to ensure compatibility to maximize the transfer of textures. Please note that the web app only works with packs for 1.16.2, 1.16, 1.15, 1.14, and 1.13.
4) Experimental Conversions
Navigate to the web app from step one. At the bottom, you’ll find the option “Experimental Conversions”. Enabling it prompts the program to attempt additional conversions for horses, weather (rain and snow), and GUI (buttons, tabs, dialogs, inventory, and crafting tables). Keep in mind that this may not always be flawless, and glitches could arise. You can toggle this experimental feature on or off.
5) Port a Java Texture Pack to MCPE
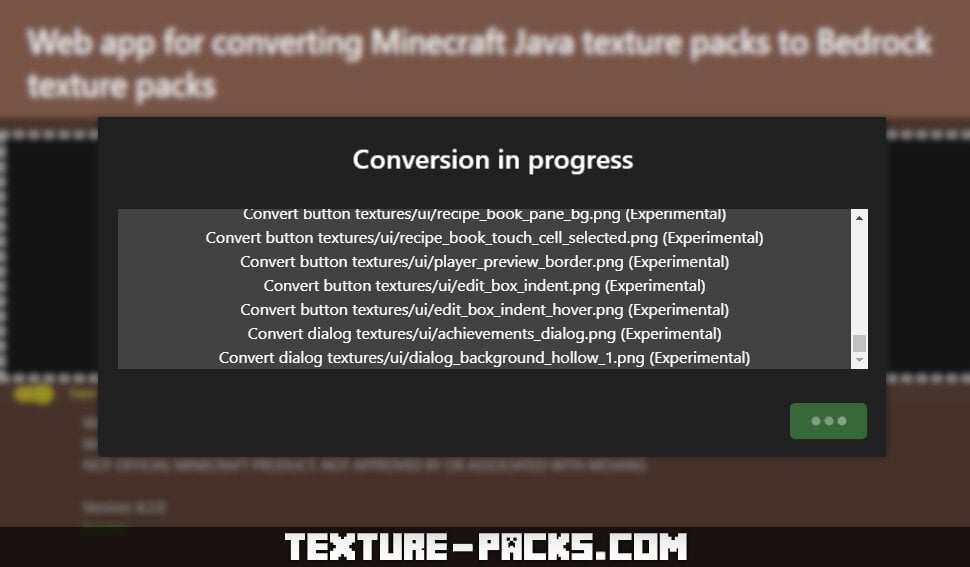
Proceed to port the Java texture pack to MCPE. If you’re using a mobile device, tap on one of the two green buttons and select the pack you wish to convert. On a computer, you can drag and drop the ZIP archive into the selection window, initiating the conversion. All textures will be converted into an MCPACK file. If you’ve opted for high-resolution textures, the porting may take longer. This happens because your hardware needs sufficient RAM corresponding to the file size and content of the texture pack. It’s important to note that this converter does not use temporary storage but utilizes RAM for the conversion.
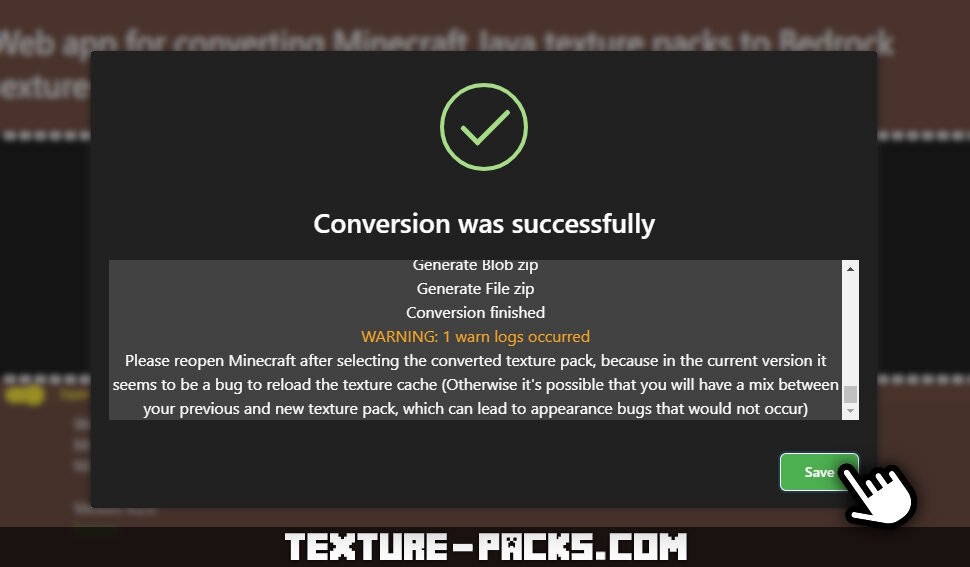
If the converting to MCPE was successful, a message reading “Conversion was successful” will appear in your browser. You can start downloading the MCPACK file with a click on “Save”. Note that if your internet connection is slow, the download might take some time.
6) Install the Converted Pack in Minecraft PE
To install the new pack, double-click on the downloaded file. This action will prompt Minecraft PE to open, displaying a message indicating the commencement of the import. Proceed to the “Settings” menu, scroll down to “Global Resources”, and verify whether the converted pack is listed under “My Packs”. Click on “Activate”, and all the associated resources will be loaded.
After selecting the converted texture pack, it’s recommended to reopen Minecraft. This is essential because sometimes appears a bug related to texture cache reloading. Failure to do so might result in a mix between your previous and new MCPE texture pack, leading to graphic bugs that wouldn’t otherwise occur. In the event of a Minecraft crash, it may not necessarily be related to the installed textures. Additionally, refrain from reporting Java or Bedrock version changes, as the converter tool may not account for these alterations.
In summary, you are now acquainted with all the crucial information, and the guide on how to port Java texture packs to MCPE and Bedrock is complete. If you enjoyed this article, feel free to leave a comment or explore our other tutorials!

cool
i tried converting faithless java to bedrock but when i load a world with the texture pack it crashes?? can someone help??