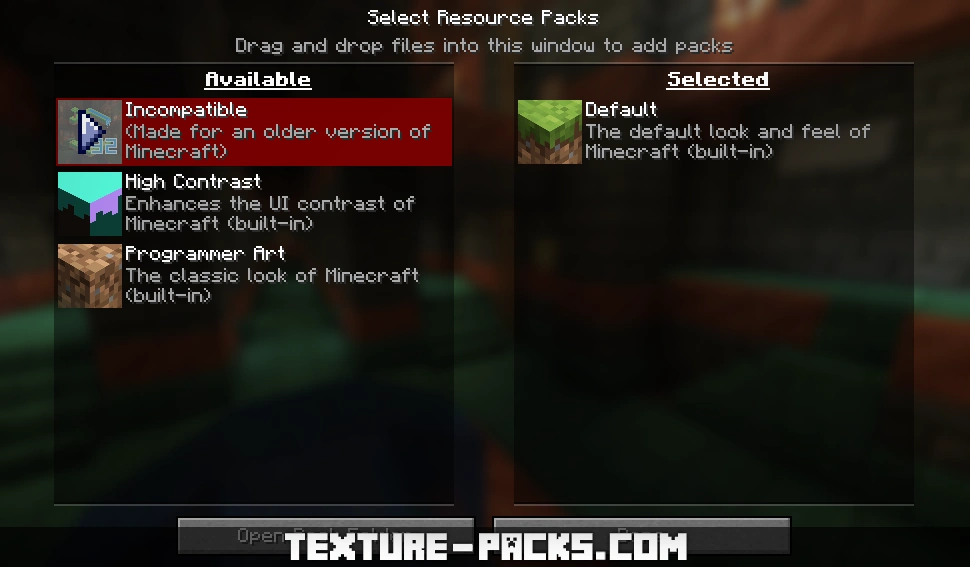
We don’t know about you, but it’s frustrating for us that Minecraft keeps disabling our pack and giving us the Incompatible: “Made for an older version of Minecraft” message. Luckily, there is an extremely simple fix for this!
Why Does This Incompatibility Warning Appear?
This incompatibility warning has been around since Minecraft 1.9, which was released in 2016. That update marked the beginning of more frequent game updates, bringing tons of new blocks, items, and mobs in a short amount of time. Before this, you could use older texture packs without any error messages. However, with so many new features being added, the file structure of resource packs and texture packs often had to be updated. To address this, Mojang introduced the “made for an older version” warning.
This message is meant to inform you that the creator designed the pack for an older version of Minecraft. Mojang decided it was better to warn players rather than deal with a flood of bug reports about broken textures. While this warning is helpful in many cases, some packs remain fully compatible regardless of the notification that Minecraft displays.
On the flip side, you might also see “made for a newer version of Minecraft” when trying to install a newer resource pack on an older version of the game. Both warnings serve the same purpose: to help you identify potential compatibility issues before you start playing.
How to Fix “Made for an older (or newer) version of Minecraft”
Fortunately, bypassing these error messages is incredibly easy. First, don’t worry about breaking anything—these warnings only apply to third-party files and won’t affect your Minecraft installation or your game worlds. At worst, you might encounter minor graphical glitches.
This method works most of the time and is perfect if you’re not tech-savvy or don’t want to spend much time fixing the issue. However, if you want the “made for an older (or newer) version of Minecraft” warning to disappear permanently, you’ll need to follow a few straightforward steps.

1) Unzip the Resource Pack
First, go to Options > Resource Packs and open your pack folder at the bottom left. For example, we are fixing the Faithful resource/texture pack for this tutorial. To begin, take the pack out of the folder. It’ll disappear from the Minecraft screen if you take it out of the folder since we need to make some changes before re-importing it.
Next, make sure the texture pack is on your desktop for easy access. If the pack is a ZIP file, right-click it and choose “Extract All”. If you don’t see that option, you’ll need to download a program like 7-Zip or WinRAR to unzip files on your PC. Extract all files, and you’ll see a new folder. You can delete the original ZIP file because you won’t need it anymore. The extracted folder contains all the files you’ll be editing.
2) Modify the “pack.mcmeta” File
After opening the folder, locate the pack.mcmeta file. This is what you need to edit. Open it using a text editor like Notepad. Once the file is open, look for the “pack_format” line. This number tells Minecraft which version the pack is designed for.
List of Pack_Format Numbers:
- 1 for 1.6.1 – 1.8.9
- 2 for 1.9 – 1.10.2
- 3 for 1.11 – 1.12.2
- 4 for 13 – 1.14.4
- 5 for 15 – 1.16.1
- 6 for 16.2 – 1.16.5
- 7 for 1.17 – 1.17.1
- 8 for 1.18 – 1.18.2
- 9 for 1.19 – 1.19.2
- 12 for 1.19.3
- 13 for 1.19.4
- 15 for 1.20 – 1.20.1
- 18 for 1.20.2
- 22 for 1.20.3 – 1.20.4
- 32 for 1.20.5 – 1.20.6
- 34 for 1.21 – 1.21.1
- 42 for 1.21.2 – 1.21.3
- 46 for 1.21.4
- 55 for 1.21.5
To update the pack for your desired version, look at our list of pack_format numbers and find the correct one for your Minecraft version. For example, if you’re updating for 1.21.4, the pack_format should be set to 46. Change the code in the file to match your version, but be careful not to remove anything else—like commas or quotation marks—as that could break the pack. Once you’ve updated the number, save the file and close the editor.
Keep in mind that you’ll need to repeat this process every time Minecraft receives a new update. However, starting with version 1.20.2, there’s a much easier solution: adding an extra line of code for supported formats in your pack.mcmeta file. We strongly recommend using this method since manually updating the pack for every minor release can be very time-consuming.
If you’re playing Minecraft 1.20.2 or later, you can use our pre-made pack.mcmeta template. Simply copy and paste the following code into your file:
{
  "pack": {
    "pack_format": 46,
    "description": "\u00A7a\u00A7lTexture-Packs.com\u00A7r",
    "supported_formats": {
     "min_inclusive": 20,
     "max_inclusive": 999
    }
  }
}
3) Compress and Import
Now, you’ll need to re-compress the Minecraft texture pack into a ZIP file. Select all the files in the folder, right-click, and choose “Compress to ZIP”. If your operating system doesn’t have this option, use 7-Zip or WinRAR. Name the ZIP file something like “New Pack for 1.XX” to indicate the version it’s compatible with.
Open Minecraft again and load the version you updated the pack for. Go to Options > Resource Packs and open the pack folder. Place your updated ZIP file in the folder to install it and it will appear in the list. If everything is done correctly, the pack will no longer be marked as incompatible. Simply enable it, and it should work perfectly.

mega
hi, I’m technoblade
yoooooo technoblade is alivvvvvve
link plis
You don’t need a link. If you want to make your pack compatible with another version, please read the instructions in the article.