Among the range of shaders offered for Minecraft, it’s hard to find the right balance between quality and performance. However, the popular Chocapic13 shaders are now available for download! The Chocapic13 is about to blow our pixelated minds! First things first, let’s talk about versions. Currently, the pack has five main versions available: v6, v7, v8, V9, and V9.1. Now, newer versions do look better, but keep in mind they might require more performance juice and better hardware. If you’ve got a beast of a gaming rig, go ahead and grab the latest release – it’s packed with mind-blowing shader features. But fret not, if we’re rocking a modest setup, v8 performs like a champ even on low-end hardware.
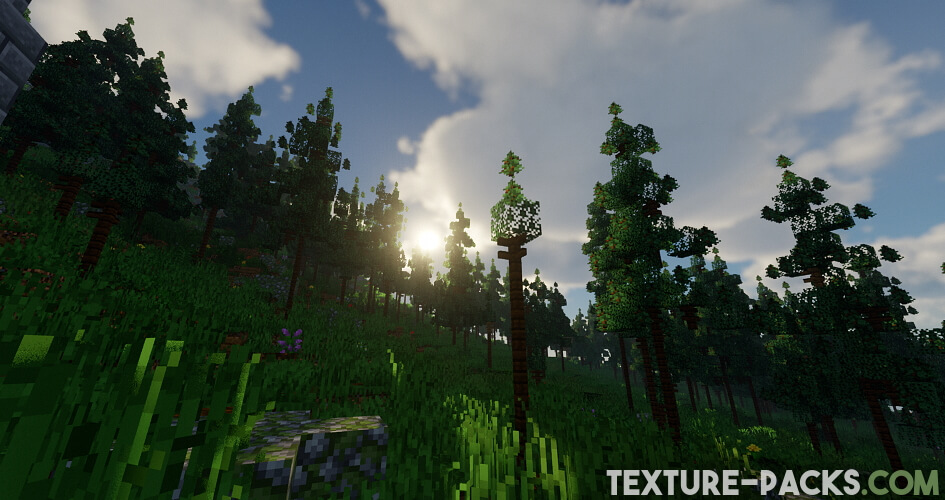
Now, here’s the nifty part: each Chocapic13 shaders file comes with five different presets to choose from. And we’re not just talking about some minor tweaks here. Nope, these presets are packed with hidden settings and quality improvements that’ll make Minecraft look jaw-droppingly stunning. Don’t believe us? Just check out the Chocapic13 screenshots further below.
The Screenshots Preset in Chocapic13 Shaders
But hold our horses, folks! There’s a little secret in version 9 that we gotta know about. It’s called the “screenshots preset”. Now, listen closely – this preset isn’t meant for regular Minecraft gameplay. It’s like having your own virtual photography studio inside Minecraft. If you hold your camera steady, it’ll start capturing images, and, voila, you’ve got yourselves some professional-grade realistic screenshots. Say cheese!
Now, we know you might be wondering about Chocapic13’s High-Performance shaders. Well, that’s a whole different ball game, and we’ll save that discussion for another day. Today, it’s all about those sweet, sweet Chocapic13 shaders for Minecraft.
Chocapic13 Shaders Features
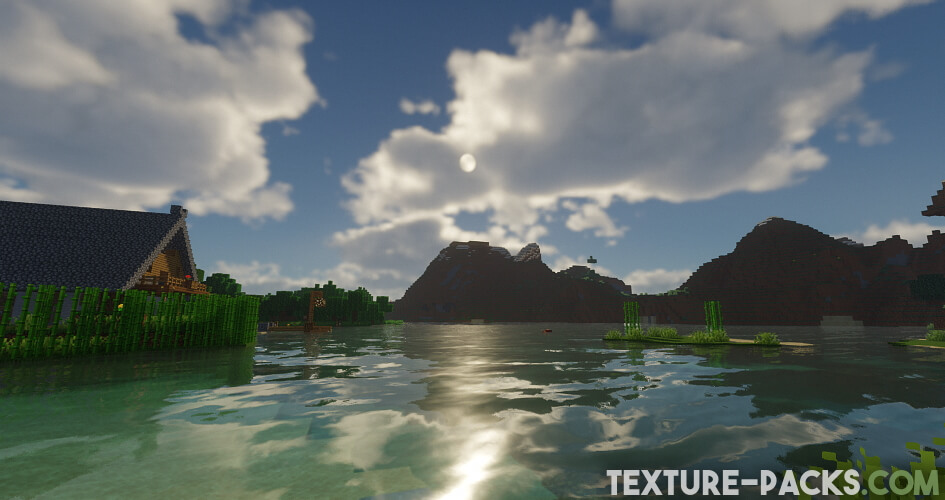
Like their counterparts, the Chocapic13 shader pack completely revolutionize the way light, shadows, water, sky, and particles are handled. Firstly, the sun finally receives a texture worthy of its name, appearing round like an orange and realistically colored, just like the light it emits. The same level of attention is given to the moon and the stars.
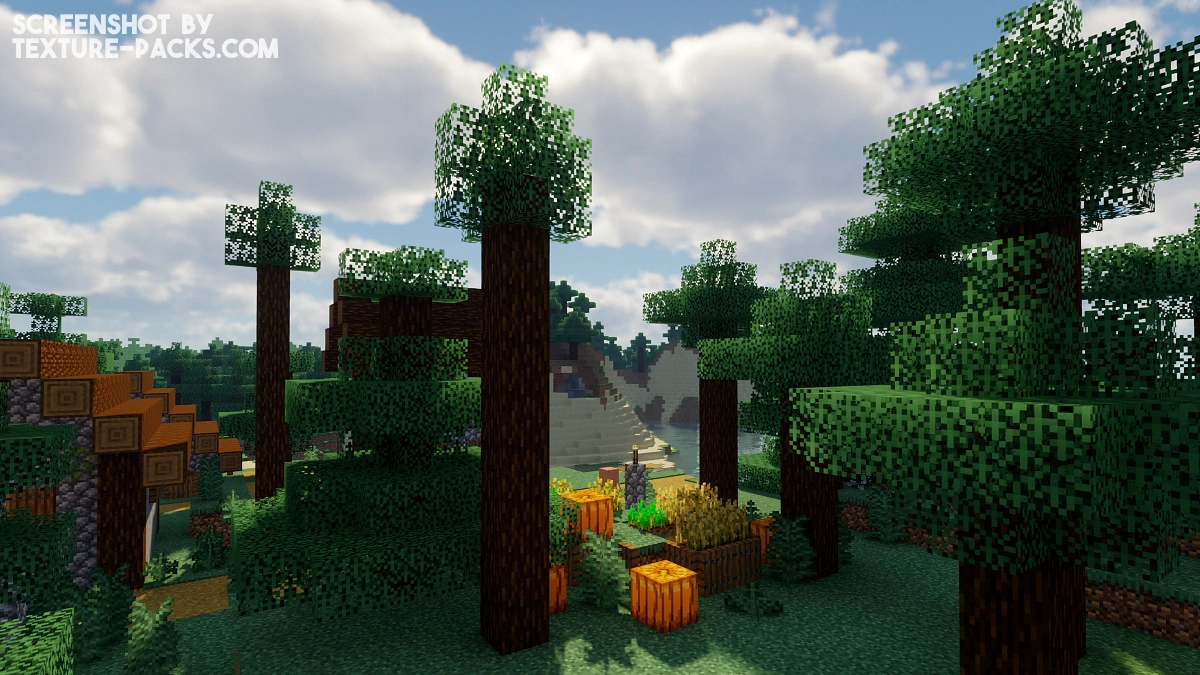
Furthermore, as we have our eyes fixated on the sky, let’s not forget to marvel at the clouds, which have shed their cubic appearance and embraced complex and realistic shapes, reminiscent of cirrus clouds or cumulonimbus clouds. In a similar vein, Chocapic13’s shaders modify most of the Minecraft particles.
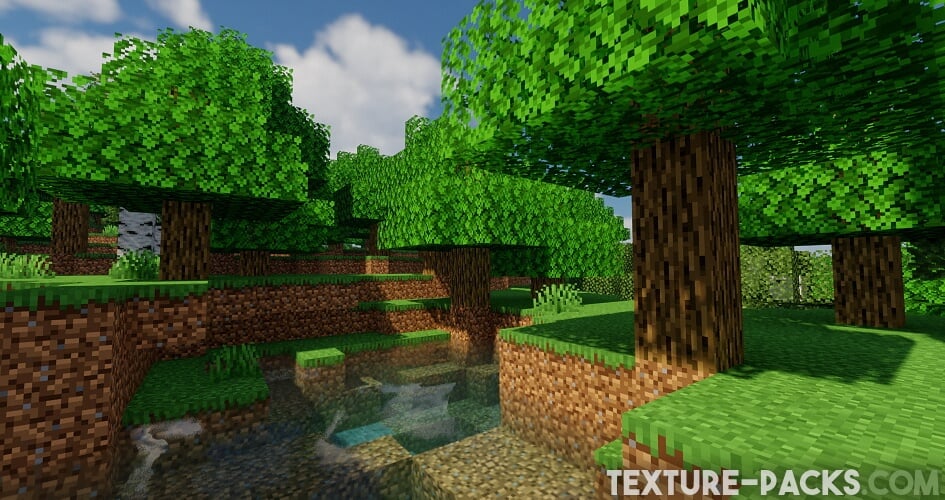
Let’s turn our focus back to the light; it is handled with greater flexibility than in Minecraft vanilla. Not only will it dazzle you, but its hues will also vary depending on the light source. Moreover, shadows are no longer handled block by block but are influenced by the direction of the light, resulting in a much more realistic rendering. Last but not least, water undergoes significant and natural changes, affecting its animation, color, reflection, and texture. The improvements will surely leave you amazed.
Ideal for Survival Adventures
One impressive aspect of these shaders is their compatibility with survival gameplay. Unlike some other shader packs, Chocapic13 shaders don’t drastically change the mining gameplay or make caves overly dark and scary. They maintain high-quality visuals while allowing you to enjoy normal activities like fishing and cave mining. While we’re on the subject, the Visible Ores texture pack will help you find ores in Minecraft more easily. In conclusion, even at night, the shader doesn’t make everything pitch black.
Chocapic13 Shaders Edits
Did you know that you can also download some awesome edits of the Chocapic 13 shaders? Yes, you heard it right! The pack is so popular that other shader developers have adapted the code to their preferences and published it. These edits are like custom flavors of the base project, created by talented players of the Minecraft community. They might just become your new favorites!
Chocapic13 Edits:
The following shader packs are not edits, but some code is from Chocapic13:
Chocapic13 Shaders Best Settings
Go to Options > Video Settings > Shaders and click on “Shaders Options” to open the Chocapic13 settings.
We will guide you through the best settings for Chocapic13 to achieve extremely realistic visuals and optimal performance with high FPS. Firstly, our goal is to enhance the game’s historical charm while benefiting from impressive shadow effects.
Atmospheric
So, let’s start by adjusting the atmospheric settings in the Chocapic13 shaders. Set the bloomy fog to 0.5 for enhanced visibility. After that, click on “Fog_Densities” and reduce the fog rain multiplier to 0.2 to get better visibility during rain and thunderstorms. Another great setting for Minecraft fogs is the base fog amount, which you need to set to 10.0 for a nice distance fog effect. If you have problems during the night, you can make the Chocapic13 shaders brighter if you set the “FOG_TOD_MULTIPLIER” to 0.2. For underwater exploration and improved visibility in the water, tweak the underwater fog density. We suggest setting it to 0.01.
Camera
Go back to the shader options and click on “Camera”. We recommend setting the exposure multiplier to 2.0 and the bloom strength to 0.5 for higher FPS with the Chocapic13 shaders. To achieve a balanced effect, set the camera exposure speed to its maximum, which is 5.0. With that, you get better general visibility at night and adjust the glow effect of light sources. By the way, the exposure speed reduces the time that the shader pack takes to adjust the view between bright and dark areas. If you like to see this effect a little bit longer, then feel free to change this setting to whatever you want.
Remain in the camera settings and click on tone mapping. For the best graphics in Minecraft, we recommend setting the crosstalk to 0.36, which will refine the color transitions between day and night. In our tests, we noticed that some blocks and the text on signs are hard to see at night. You can solve this problem by setting the tonemap to “Tonemap_Uchimura”. This adjustment will make details more visible during nighttime.
Purkinje
Now, go back to the shader options and click on “Purkinje_effect”. This effect determines how strong the change of colors between day and night is. You should change the Purkinje strength to 0.8 and the Purkinje multiplier to 2.8. That’s it for this setting and you can go back to the Chocapic13 shader options.
Lighting
Now, we will tweak the lighting settings. Select lighting in the menu and click on “Torch”. Here you can correct the light color to reduce the very orange and reddish look of light sources at night. We recommend changing “TORCH_R” (red) to 0.64, “TORCH_B” (blue) to 0.36, and “TORCH_G” (green) to 0.42. Also, you have to reduce the “torch_amount” to 0.5 to reduce the glow of the lights. However, these settings will only look good if you have already adjusted the camera settings as described.
Next, go to the sky settings. Let’s target the sky coefficients first. Here you should set the sky brightness to 2.0 to over blend stars that otherwise would be visible in broad daylight. For a smoother sunset and sunrise, we recommend increasing the “sky_coefficentRayleightR” to 6.3.
Let’s optimize the Minecraft sun and moon’s appearance. First, set “sunColorB” to 0.61 and the “sunColorG” to 0.78. Adjust the “sun_illuminance” to 40000.0 and “moon_illuminance” to 30.0. This will give you a smoother overall color distribution and counter the increased exposure from the camera settings. We are almost done with the best settings for the Chocapic13 shaders!
Water and Transparencies
Once again, go back to the shader options and click on water and transparencies. The first thing you need to do here is to set the dirt amount to 0.08. That gives you better visibility with the Chocapic13 shaders and leaves enough particles to filter out the red light. Now, enter the advanced settings. Here, you can adjust how light is distributed if you dive into the ocean. If you want clear underwater with the shader pack, set “Dirt_Absorb_G” to 1.46, “Dirt_Absorb_R” to 0.1, and “Dirt_Absorb_B” to 0.02. On top of that, change the amount of “Water_Absorb_R” to the maximum and “Water_Absorb_B” to 0.12. As a result, you get bluish water with good visibility, like with the Night Vision pack.
Chocapic13 Shaders Highlight: Wavy Stuff
To be honest, the wavy stuff is just optional. But in our in-game tests with the Chocapic13 shaders, we liked the wavy leaves on trees. However, it looks like there is a permanent hurricane in Minecraft with the default settings. Therefore we recommend slightly reducing the wavy strength to 0.75 and the wavy speed to 0.7.
Remember, Chocapic 13 shaders’ best settings may seem a bit overwhelming at first, but take your time to experiment. Once you’ve set up the pack just the way you like it, you’ll love the new Minecraft graphics. So, what are we waiting for? Let’s head on over to the free download links and pick your preferred version. What do you think about this project?
Video & Screenshots
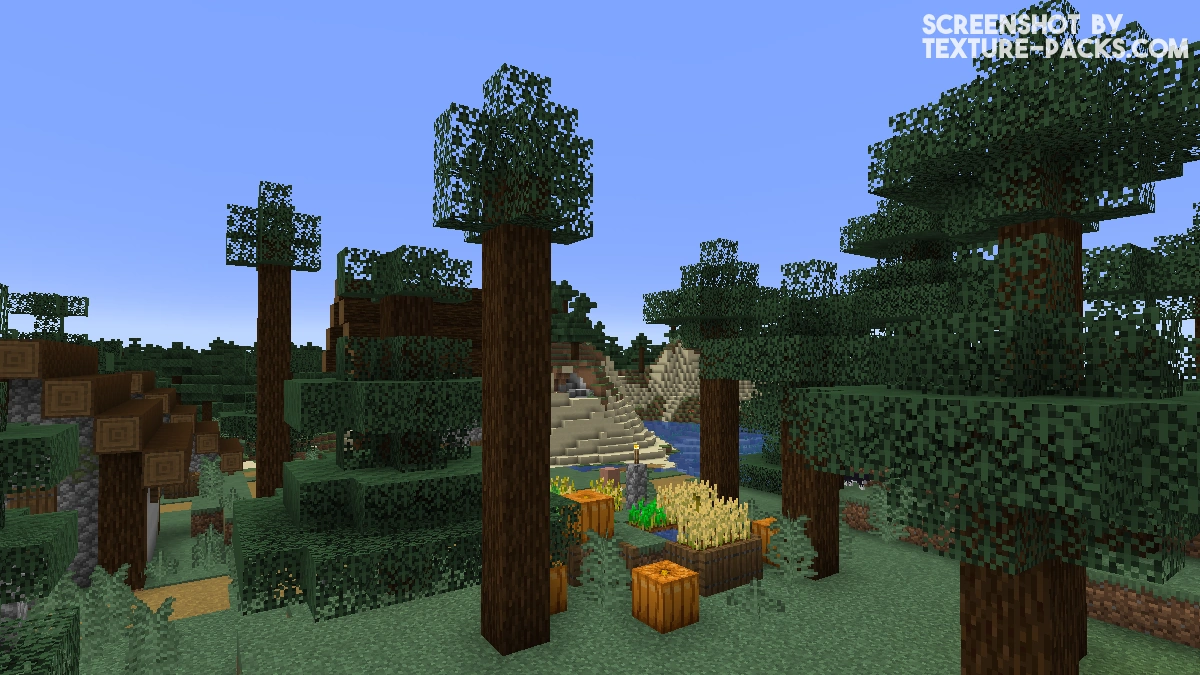
Comparison
Use our comparison tool to compare the Minecraft default pack with Chocapic13.
How To Install Chocapic13 Shaders
Here’s a tutorial on installing Chocapic13 in Minecraft Java Edition.
- Download the Chocapic13 shaders for Minecraft from the file section below. Pick the file that matches your Minecraft edition and version.
- Install Iris or OptiFine. The Iris mod is recommended for better performance with higher FPS.
- Open the Minecraft launcher, and choose the Iris or OptiFine profile you just made.
- Launch Minecraft.
- For Iris: Go to "Options", then "Video Settings", and select "Shader Packs". Next, click on "Open Shader Pack Folder" to access the shaderpacks folder. For OptiFine: Navigate to "Options", then "Video Settings", and click on "Shaders." Afterward, click on "Shaders Folder" to open the shaderpacks folder.
- Move the downloaded ZIP file into this folder (.minecraft\shaderpacks).
- In the game, choose the newly installed pack from the shaders list. If you select a shader pack using Iris, its filename will turn yellow.
- Click "Done" or "Apply" and all new features have been loaded.
Chocapic13 Shaders Requirements
First off, it’s crucial to have your graphic drivers updated to the latest available version. The developer Choca_13 recommends this to enjoy the new features without glitches, like a white screen. Next up, make sure your target Minecraft resolution has a minimum of 500 pixels on each axis. This will ensure that the shaders can display their full glory without any hiccups. Also, make sure to activate the sky in the Minecraft settings. This will make your Minecraft world feel more alive and improve the Chocapic13 effects.
Oh, and one more thing to note – while Chocapic13 shaders work like a charm with most texture packs, custom skies might not always be supported. So, if you want the shaders to work their magic, stick to the default sky or sky textures that are compatible with the pack.
Chocapic13 Shaders Download
Download Chocapic13 Shaders Extreme V9.1
Download Chocapic13 Shaders V9– Unzip the file and choose extreme, ultra, high, medium, or low.
Download Chocapic13 Shaders V9 Screenshot Mode
Chocapic13 Legacy Versions (Java Edition):
Download Chocapic13 Shaders Ultra V8
Download Chocapic13 Shaders V7– Unzip the file and choose extreme, ultra, high, medium, low, lite, or toaster.
Download Chocapic13 Shaders V6– Unzip the file and choose extreme, ultra, high, medium, low, lite, or toaster.
Chocapic13 High Performance (Java Edition):
Download Chocapic13 High Performance Shaders

I love this shader!!!!!
Very good requirements
what are the minimum requirments
For the toaster shader, anything above old intel integrated graphics should work (Newer intel integrated graphics will work)
Can I run this shader pack with MAX settings (No shader) with Ryzen 7 5800X with RTX 3060 + 16GB ram?
Ofc you can
i don’t know how put it in minecraft xd
You need also Optifine. Above is a installation guide.
How to download it in pe ios
is for java
bruh u cant this is 4 java
how to download it
Further above is a tutorial.
Nice shaders
nice shaders and when i have them on my pc i get 300fps
damn you gotta have some insane specs
I really like these shaders but I’m having problems with my shadows flickering when looking at a certain angle, any tips?
try 1.16.3
i then have 7 fps 🙁
download the lite one
wich one is the java edition
They all are
hey man how do i put the shaders in my world? it isnt letting me to it in resource packs i need help
You have to have optifine
my minecraft closes when i put the shaders
This means that your hardware is too bad for a shader.
how do i put the shaders in my minecraft world?
im playing on bedrock
what does it mean by V9.1 V9 V8 and V7. Which one’s which
The numbers indicate the versions. The highest number always stands for the latest version.
how to download the lite version?
“Bad PC Version” is the lite version
Everytime I activate the shader and go into a world my game crashes. I’ve uninstalled everything and reinstalled and cant figure the issue out. (I have an AMD CPU and GPU Mid-Range) EDIT: I got it fixed! Thank you for this beautiful shader!
HOW PLEASE TEEL ME
how did you fix it?
I don’t like that I can’t add them, cause we probably have no optifine
How did you fix it?
how did you fix it
this is shaders is epic!
I am receiving an error when loading into my Minecraft World with these Shader packs. The error stating: Invalid program “gbuffers skybasics”. I believe this error is causing the sky in my world to appear dark with no sky.
Which Minecraft version do you use?
Any Version Work. You Only Need Optifine For Specific MC Version. BRUH..
I don’t use any just beta